ECP CI Startup Tutorial
Target Audience |
Code teams that wish to begin using GitLab CI as part of their testing strategy. |
Requirements |
Hands-on sections of the tutorial have been written for general container based resources on GitLab, and only requires a compatible browser. |
Estimated Time |
1 to 1.5 hours |
Welcome to the CI Startup Tutorial! We want this tutorial to provide guidance to project teams interested in getting started, not just with ECP resources but GitLab CI in general. We’ve written this to offer as much flexibility as possible and provided hands-on portions targeting a range of potential CI instances. Throughout this tutorial we will reference upstream documentation that can further clarify key functionality and would like to encourage you to make use of the official user documentation.
Though we hope you are joining us for a conference tutorial, it is by no means required as this hands-on can be entirely self-guided.
Supported Instance
It is not always possible to establish a shared example project across a wide range of potential resources (e.g., facility specific runners and configuration will present different requirements). Our documentation primarily targets resources available on GitLab but any instance with access to a container based runner should be able to follow along.
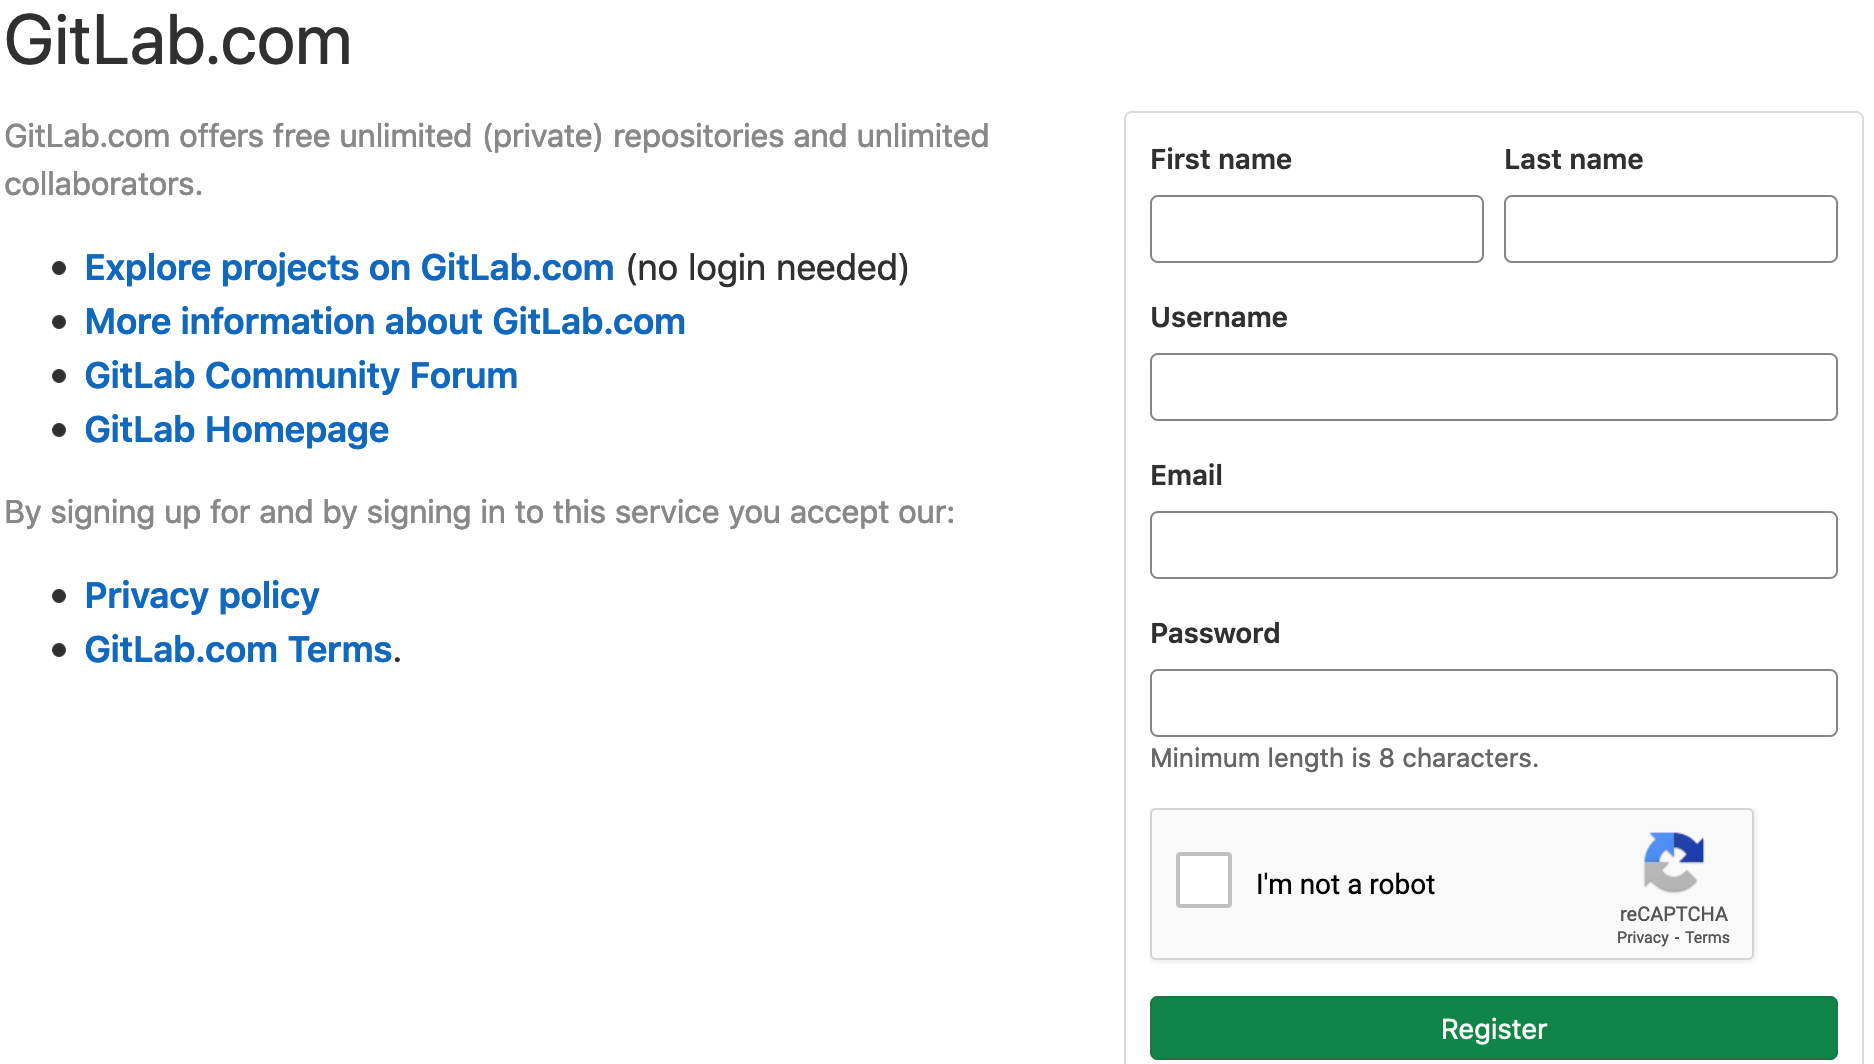
All hands-on portions of the tutorial can be completed using GitLab which offers a set number of CI/CD pipelines minutes to all users. If you do not have a account and wish to create one simply navigate to the signup page and follow the instructions:
In all cases we attempt to limit the time requirements of CI/CD jobs within the tutorial. We hope these constraints help to limit any resources usages associated with your project/account to a reasonable level.
Navigating GitLab CI
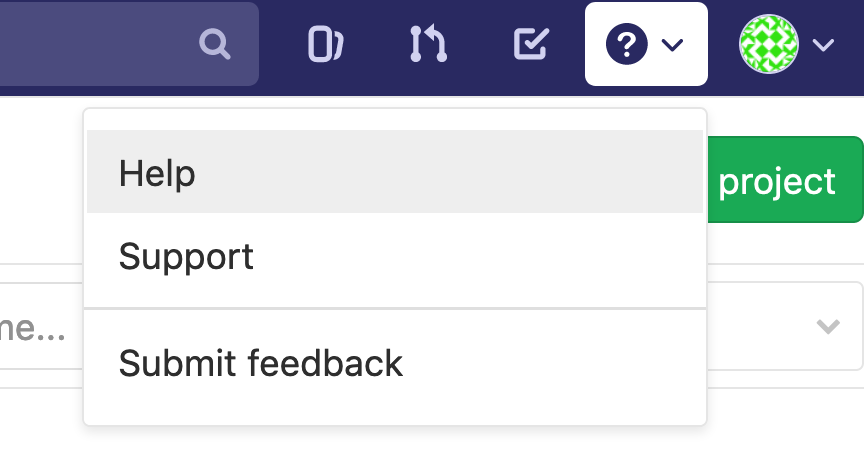
Start by determining the version of your GitLab by selecting the ? icon from the top right corner and then Help. The GitLab version will be displayed at the top of this page along with links to version/deployment specific documentation.
Note
Some sites may choose to disable this option, in these cases please reference your site’s local documentation to identify the instance variable.
The version of the server plays an important role in the CI/CD process as a majority of the upstream functionality you may wish to leverage is directly influenced by this. For the purposes of all hands-on portions of this tutorial we are expecting version 13.8+.
Next you will want to fork the tutorial project into your user namespace. Identify the source project based upon the resources you will be using for the tutorial:
Note
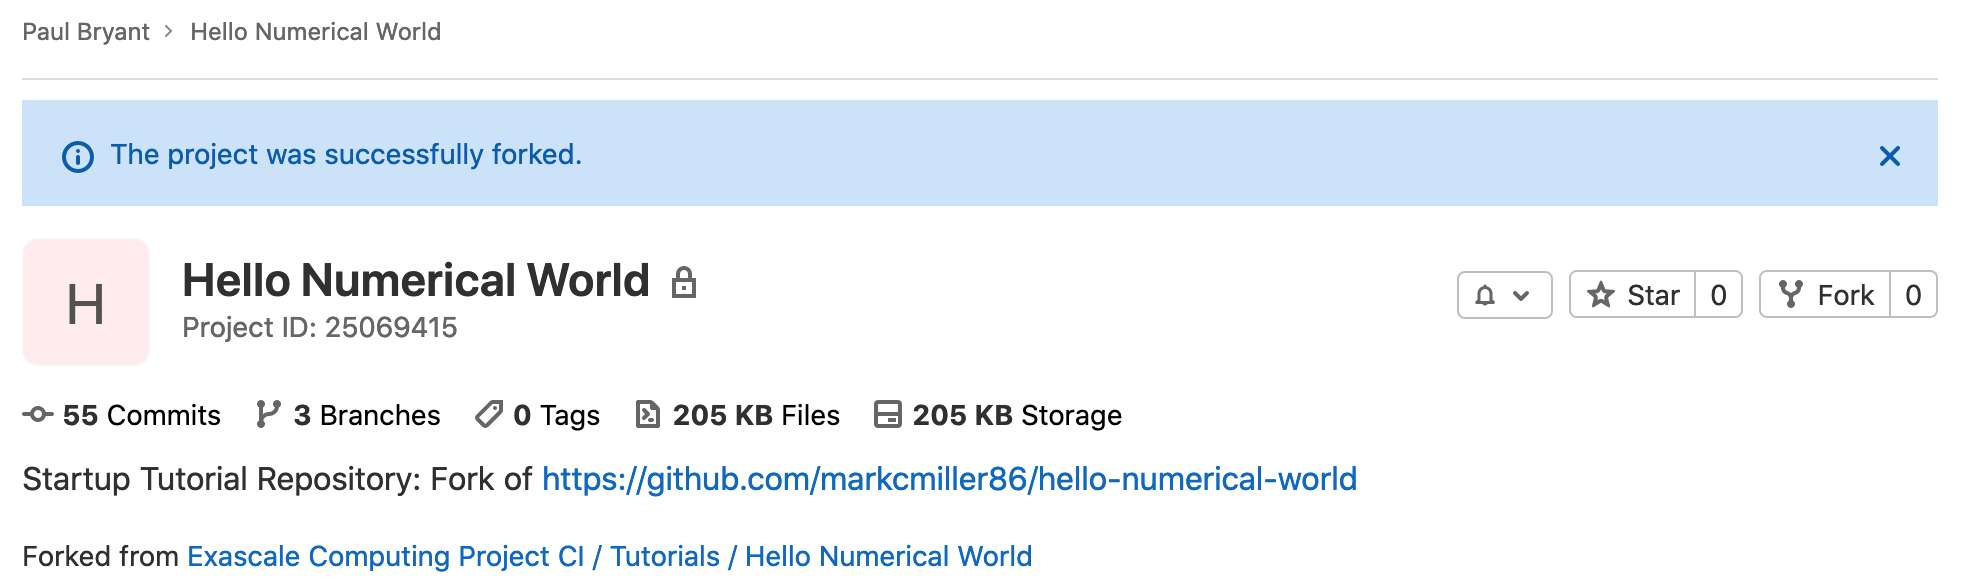
We are excited to be using a mirror of the
Hello Numerical World
project. The application associated with this project solves a one
dimensional heat conduction problem. For complete details, including
the associated Hands-On Lesson please see the project’s README.md.
Upon successfully forking the project you will be automatically redirected:
Changes can be made freely to this newly created project copy as they can only be suggested back to the source project through a merge request.
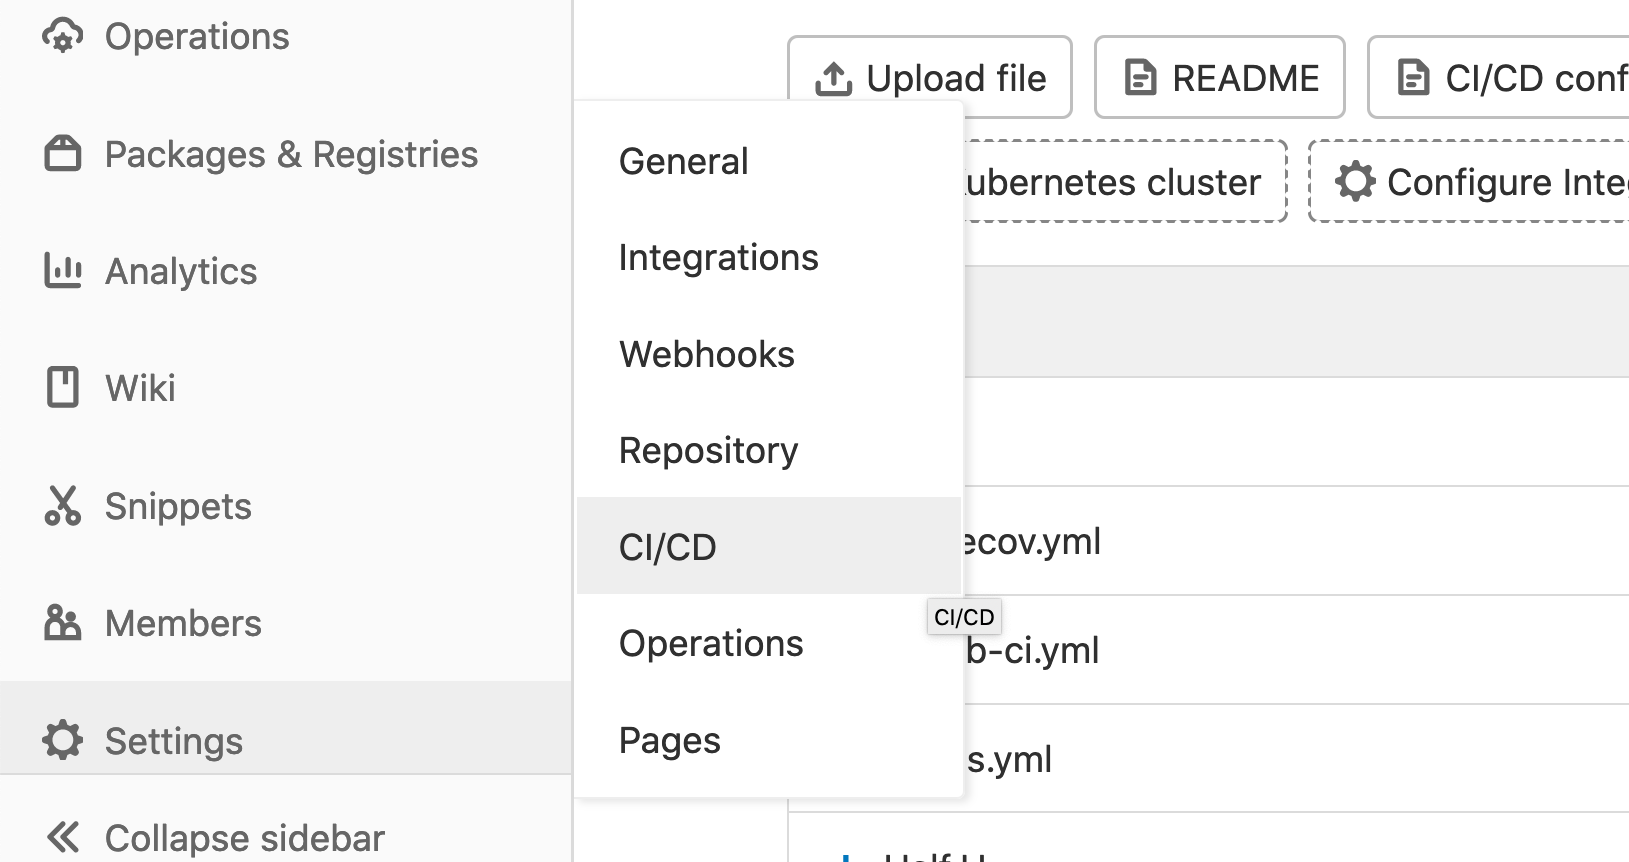
Begin by navigating to Settings > CI/CD, depending on your screen size, you may need to un-collapse the sidebar.
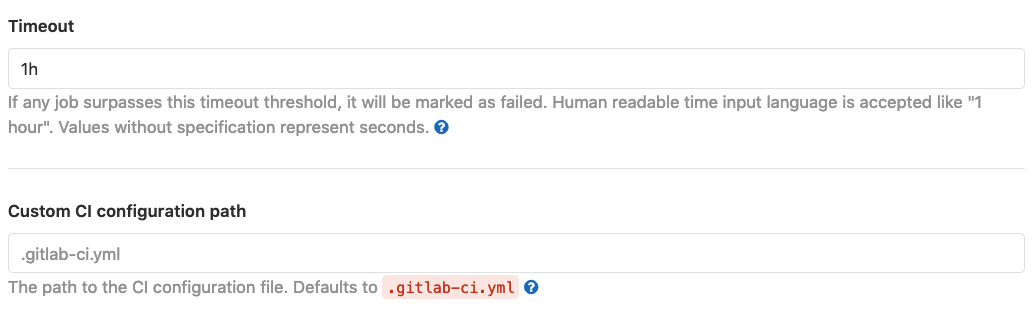
Once in the CI/CD Settings page you will notice a number of configuration options. We encourage you to explore these if time permits, but there are several that are important to highlight. In the General Pipelines section, some key parameters are:
Timeout: This is the default timeout (one hour) for each CI job. A CI job, however, is something quite different from the jobs run by a scheduler (e.g., wallclock) on behalf of a batch executor. It is important not to confuse these two wholly different timeout parameters. This value can also be overridden at the job level; however, neither case can exceed the runner’s maximum timeout.
Custom CI Configuration Path: This is the default path within the repository at which to find the YAML file controlling CI/CD behavior. The default is
.gitlab-ci.yml. This can useful to alter when managing CI across multiple mirrors.
If we Collapse the General section and Expand the Runners section,
we can view available runners (and register new ones). This page shows the
runner’s current status (hopefully a green dot indicating it is healthy).
There is also a list of tags associated with the runner. Tags are defined
by whomever administers the runner and are used in .gitlab-ci.yml files
to target CI/CD jobs to specific runners. Knowing how to find these
tags is important.
Important
In any future work with CI, regardless of platform, it is important to notes that it is your responsibility to observe all rules appropriate for the type of code/data you are managing. Please consult with your project teams and facility where required.
Introductory CI Workflow
All CI/CD functionality we demonstrate in this tutorial is controlled via
a special YAML
file in the root directory of the repository named .gitlab-ci.yml.
For this tutorial we recommend leveraging the pipeline editor
which was released in server version 13.8. This is a helpful feature
available regardless of the server’s license level and offers helpful
functionality specifically for developing your project’s CI/CD.
First, each job should be assigned a stage. The naming of the
stages is arbitrary. In our example, we wish to have just a single stage
with the name make.
stages:
  - make
The variables are an important concept in GitLab CI as each job will be provided with a build environment that incorporates a number of predefined variables along with those developers may define. Let’s define a global variable(s) that will apply to all jobs within our pipeline.
Depending on where you are choosing to run your job you may be required to supply additional site specific details via your job’s CI variables.
stages:
  - make

variables:
  MAKE_CXXFLAGS: "--coverage"
We can define the job
itself, this can be an arbitrary name so long as it does not conflict
keys or the list of
unavailable job names.
In our case lets start by creating
a job entitled gcc-build and associating it with our make stage:
stages:
  - make

# ...

gcc-build:
  stage: make
If you refer back to the Navigating GitLab CI you will recall that runners are identified (targeted) via tags. Any single matching tag could be sufficient to uniquely identify it, so long as multiple runners do not share that same tag. When multiple runners are available the server will attempt to match the first available runner to a job with a subset of tags.
Since we are using the public GitLab instance, the runners available to us are Docker executors, this means all jobs will execute in container based upon the defined image:
gcc-build:
  stage: make
  tags: [gitlab-org]
  image: registry.gitlab.com/ecp-ci/ecp-ci.gitlab.io/startup-tutorial/gcc:latest
In our case we are pulling an image from the GitLab container registry; however, you are free to use other options such as Docker Hub.
Important
The difference between the container based CI runners you are using
during this tutorial on GitLab and those potentially related to ECP CI
found on HPC test resources is the image: key. As containers are
fundamentally offering us a specific software environment, the
equivalent to defining an image: in those cases would be
using facility provided modules:
gcc-build:
    before_script:
      - module load gcc/11.2.0
Add a before_script scoped to our job as well as the required
script section. This will be the core of CI job, the arbitrarily defined
code will be executed on our required test resource. The default behaviors of
the runner will ensure the Git commit associated with you job is properly
fetched and made available prior to any user defined script running. The code
defined in each of these sections will be combined and used to a generate a
single Bash script that will be executed within the scope of the CI job.
gcc-build:
  # ...
  before_script:
    - hostname
    - echo $CI_JOB_ID
  script:
    - make CXXFLAGS=${MAKE_CXXFLAGS} LDFLAGS="--coverage -lm" check
Note
At this time all runner generated scripts will execute using Bash
(potentially sh
in very limited cases) regardless of your user’s default
configurations. Be cognoscente of these when constructing your
job’s script.
Now that we have our core job script, when the pipeline is execute
we will build/test our heat application.
gcc-build:
  # ...
  after_script:
    - pip3 install gcovr
    - gcovr --xml-pretty --exclude-unreachable-branches --print-summary -o coverage.xml --root ${CI_PROJECT_DIR}
The artifacts keyword is used to specify a list of files
and/or directories that should be captured after a job has been completed.
These are then uploaded to the GitLab server, where they can be downloaded
manually and will be made available to jobs in subsequent stages of the
pipeline. In this example we are capturing a binary (heat) that we have
just compiled.
gcc-build:
  # ...
  artifacts:
    expire_in: 3 days
    paths:
      - heat
     reports:
       cobertura: coverage.xml
Note
Using artifacts may not suite a number HPC project requirements as their our limits as to maximum size one can upload that are established by the server administrators. For more complete details and other options please see the Artifacts, Caching, and Local Storage for HPC Project guide.
In our example we’ve specified the Coberture report type as it offers a mechanisms for identifying code coverage in merge requests:
There are a range of potential reporting tools that could benefit your teams workflows, and are worth investigating. Be aware though that many such tools require a licensed version of the server.
Now that you’ve completed your first .gitlab-ci.yml file
Commit changes you have made in the editor. Once completed,
navigate to CI/CD -> Pipelines.
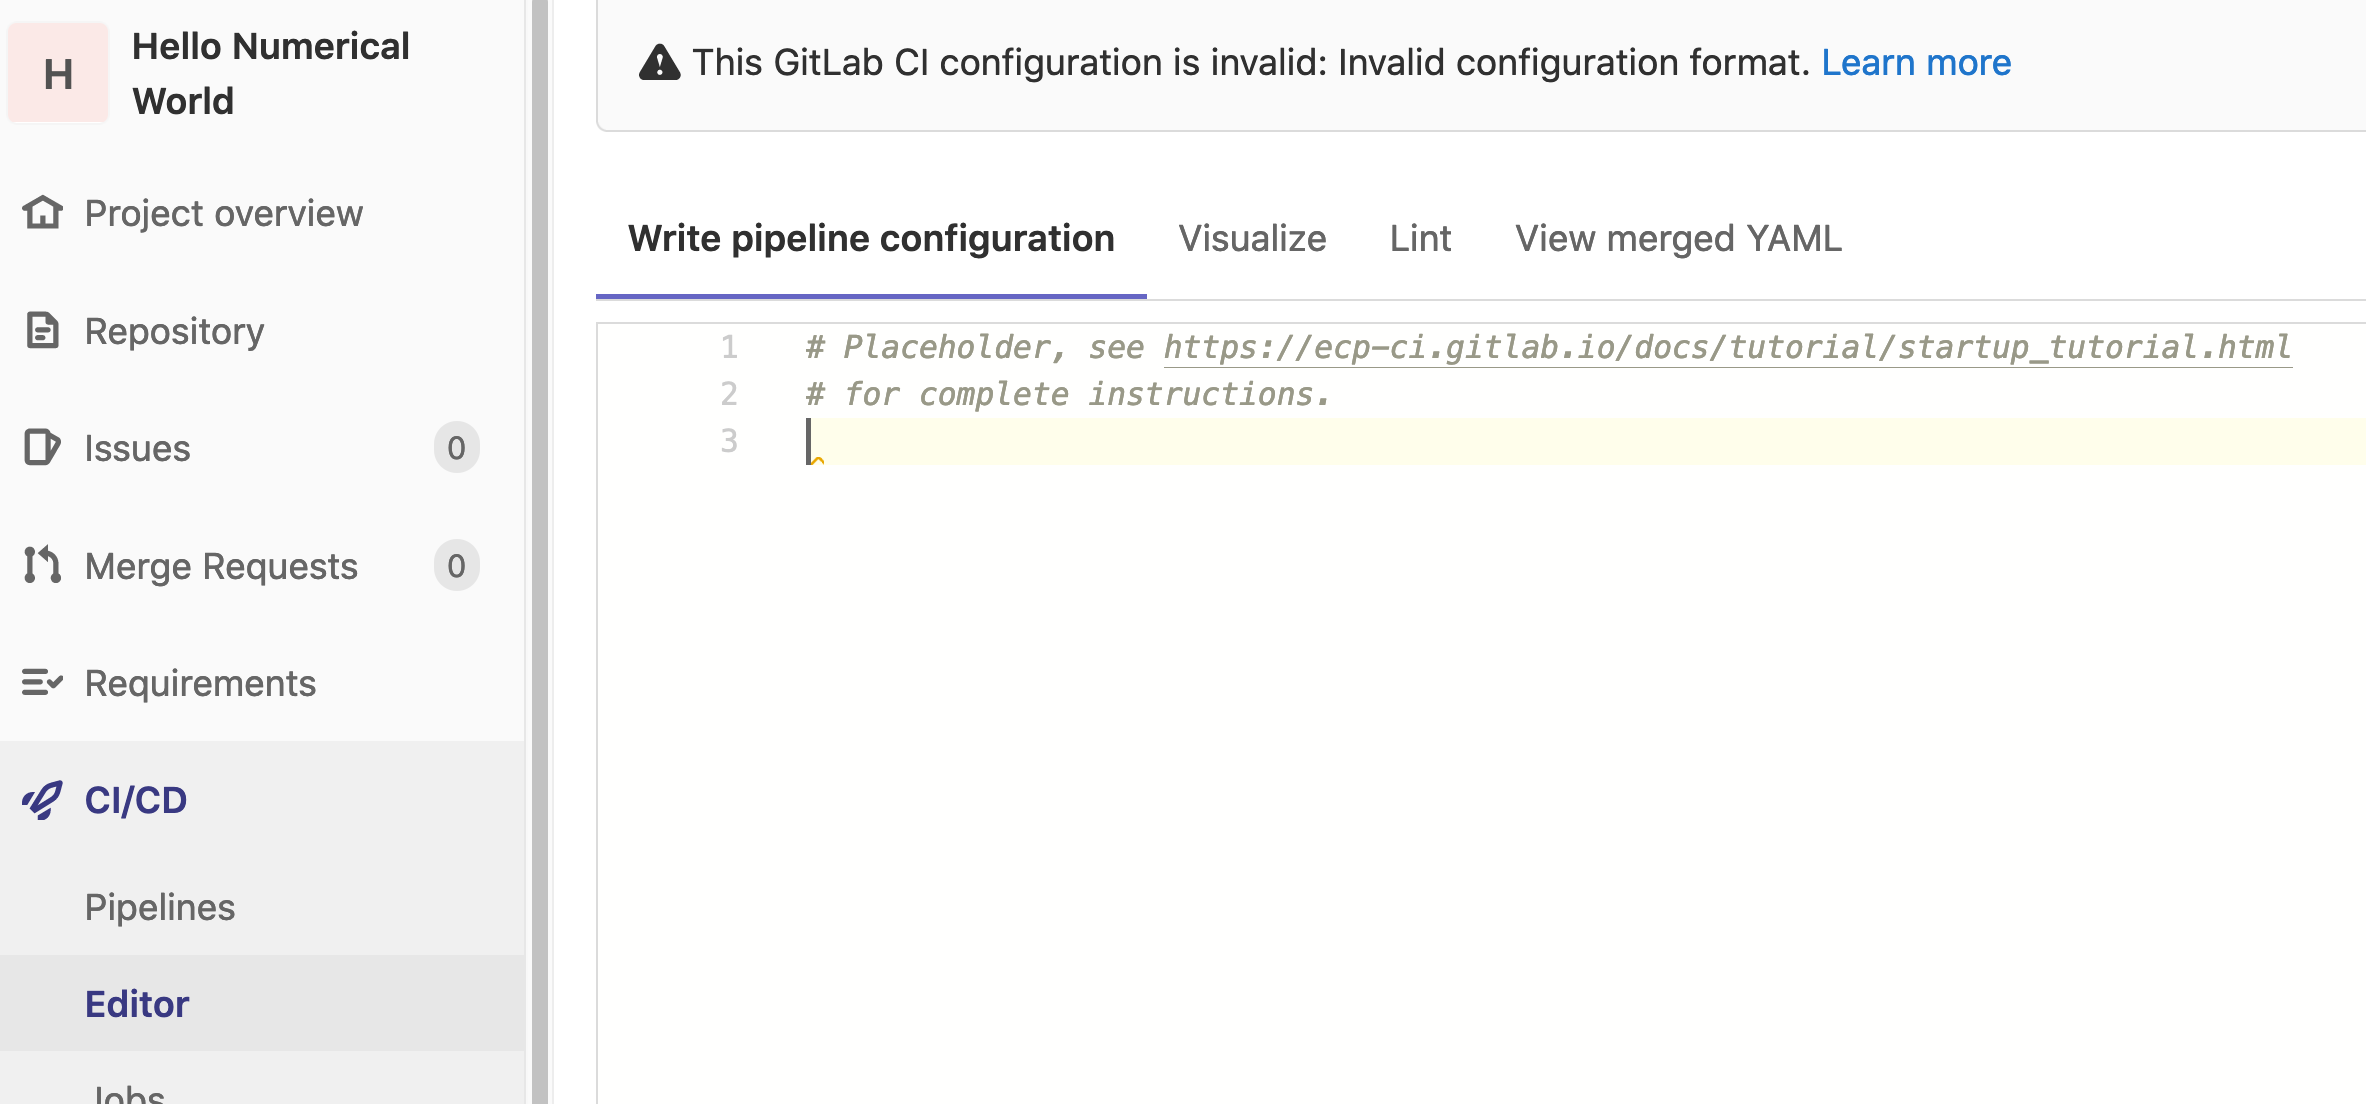
Troubleshooting your YAML
It is not uncommon to see the following error message when examining the Pipelines page:

Hovering your mouse over the yaml invalid tag can provide additional
context regarding the error. Though, a more beneficial troubleshooting method
involves leveraging GitLab’s builtin CI linter. The linter can be found within
the pipeline editor:
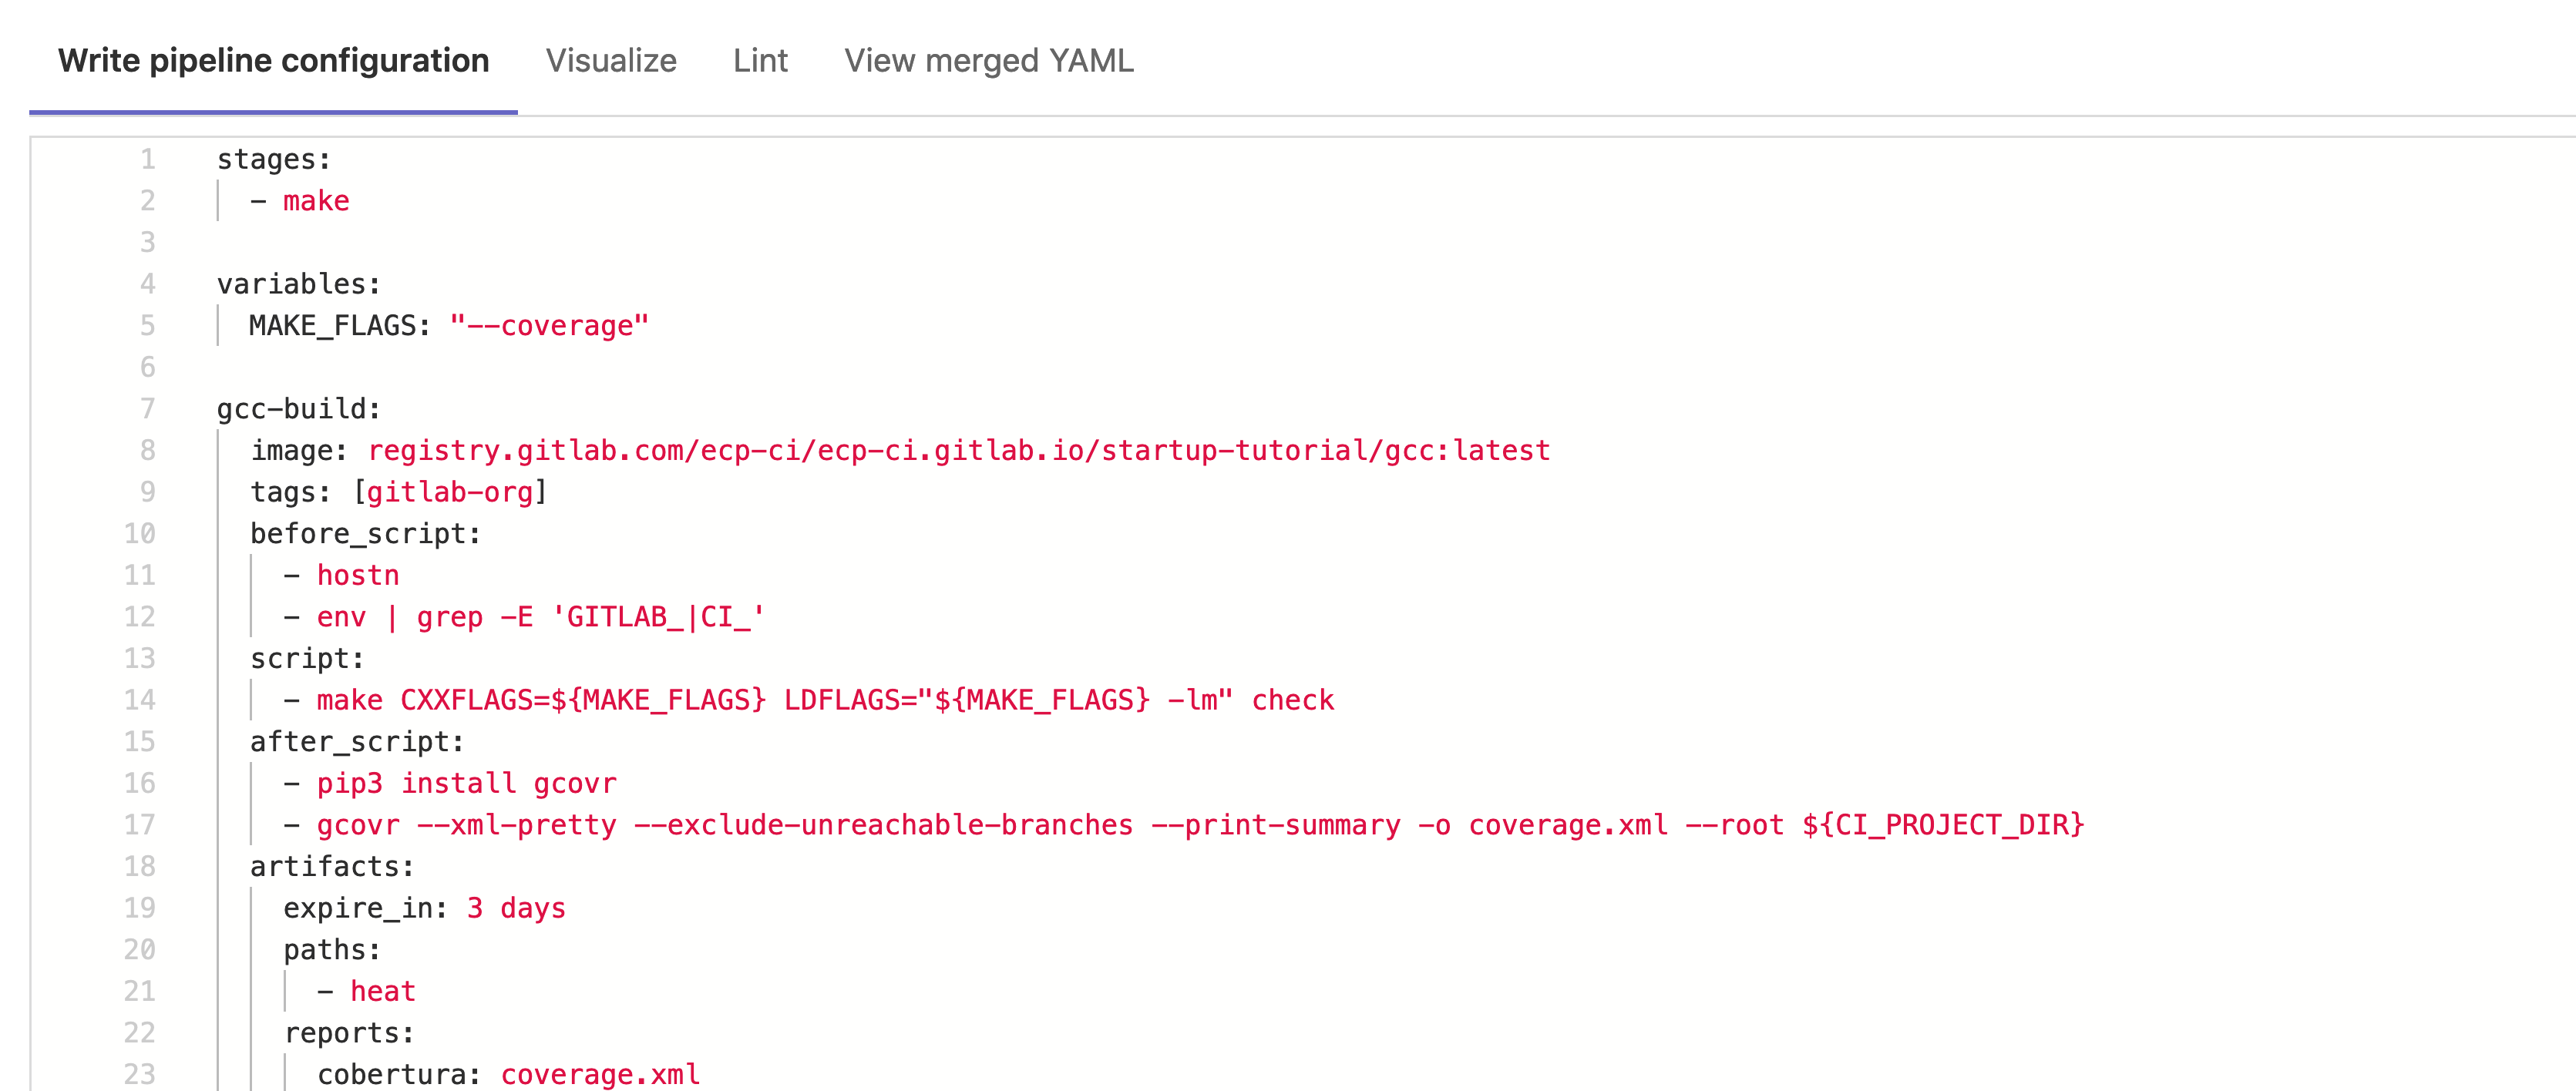
In our above example the error encountered is a missing
stages parameter, leading to the following error:
gcc-build job: chosen stage does not exist; available stages are .pre, build, test, deploy, .post
Reintroducing the code will correct this error. You may also notice that
in the before_script there is a typo with hostn as opposed to
hostname. The linter is only designed to identify mistakes in the
GitLab YAML syntax and any others error, even if they will lead to failed
jobs, will not be identified.
Completed - Intro CI
Reference of the completed Introductory CI Workflow .gitlab-ci.yml file.
 1stages:
 2  - make
 3
 4variables:
 5  MAKE_FLAGS: "--coverage"
 6
 7gcc-build:
 8  stage: make
 9  image: registry.gitlab.com/ecp-ci/ecp-ci.gitlab.io/startup-tutorial/gcc:latest
10  tags: [gitlab-org]
11  before_script:
12    - hostname
13    - echo "${CI_JOB_ID}"
14  script:
15    - make CXXFLAGS=${MAKE_FLAGS} LDFLAGS="${MAKE_FLAGS} -lm" check
16  after_script:
17    - pip3 install gcovr
18    - gcovr --xml-pretty --exclude-unreachable-branches --print-summary -o coverage.xml --root ${CI_PROJECT_DIR}
19  artifacts:
20    expire_in: 3 days
21    paths:
22      - heat
23    reports:
24      cobertura: coverage.xml
Additional Resources
We only cover a subset of capabilities throughout this tutorial we think will most benefit you and your team when getting started. For additional information and more details please see:
If you are more interested in the scientific software side, of not just CI/CD but the broader topics of testing we recommend:
Expanded CI Workflow
Again for this section of the tutorial we recommend using the pipeline editor. If you’ve skipped the introductory section please copy the appropriate Completed - Intro CI for your instance as we will be starting with that completed job.
In this section we are going to look at features that can help you and your team with:
Managing multiple interconnected job across distinct stages
Establishing meaningful rules to limit CI workflows on HPC resources
Potential workflows leaving the parallel matrix jobs
Accounting for some of the complexities of multi-tenant environments
It’s important to highlight that we always want to ensure that ECP CI resources function with established upstream functionality and most CI/CD recommendations without the need for extensive changes. The exception to this rule is always when an action would be outside of your users local permissions.
Lets start by extending the number of stages our pipeline will have:
stages:
  - make
  - run
  - plot
We’ll be adding jobs to the newly added run and plot stages over
the course of this tutorial. Next we are going to define a few global
default
configuration include:
A basic after_script after script to print some arbitrary information about our user/environment.
Setting interruptible to
trueso jobs made redundant by newer pipelines will be cancel to avoid wasting potential CI minutes or node hours.Establishing a default timeout for our
Keep in mind that any of these, or other potential global values, can be overridden at the job level.
default:
  after_script:
    - hostname
    - whoami
  interruptible: true
  timeout: 30m
Lets next write a heat-run job that will take place in our newly created
run stage. Since it is in a separate stage and executes after our earlier
gcc-build job it means that the artifact associated with it will be
available and downloaded at the start of heat-run.
Since we are able to rely on the fact our heat application will
already be compiled we can choose a smaller image, in this case
simply debian:10-slim as this should help to speed up the test.
heat-run:
  stage: run
  image: debian:10-slim
  script:
    - ./heat --help
    - ./heat dx=0.25 maxt=100 ic="rand(125489,100,50)" runame=test
We are going to run a simple command with our application that will
demonstrate a linear steady state (please see the Hands-On Lesson
for more potential details). This will generate
a series of output files describing the curve in a directly called
test/. To allow further potential examination of these results
we should gather them using the artifacts mechanism:
heat-run:
  # ...
  artifacts:
    expire_in: 3 days
    paths:
      - test/
Define a hidden job titled .manual-rules. This can later be reused,
allowing the configuration to be reused.
.manual-rule:
  rules:
    - if: '$CI_PIPELINE_SOURCE == "merge_request_event"'
    - if: '$CI_COMMIT_BRANCH == $CI_DEFAULT_BRANCH'
      when: manual
    - when: never
The rules functionality was introduced in GitLab server version 12.3 and has been expanded through a variety of MRs since then. We highly encourage you to review to official documentation on this functionality when you use it in your project. This functionality will allow us to define when jobs might be expected to run by leveraging CI variables.
Note
Though for purpose of this tutorial we’ve chosen to use rules in a very limited fashion, it can be a very important tool for limiting CI job especially if you choose to us CI with HPC resources.
The next job added will be test-plot that extends
test-plot:
  stage: plot
  extends:
    - .manual-rule
  needs: [gcc-build, heat-run]
Remember rules are evaluated in order until the first match has been
found. In the case of our job test-plot that inherits the configuration
of manual-rules:
Always run if the pipeline has been triggered by a merge request.
On the default branch (
main) the job can be manually startedIf none of the previous are realized then nothing will be run.
We’ve created a basic container that provides access to both Gnuplot and Matplotlib.
test-plot:
  # ...
  image: registry.gitlab.com/ecp-ci/ecp-ci.gitlab.io/startup-tutorial/plot:latest
  script:
    - make plot PTOOL=${PTOOL} RUNAME=test
For the final portion of our expanded tutorial we are going to use
the matrix
keyword. With this, we are able to multiple jobs in parallel, each
with a different variables value (PTOOL=???). Though we are
only highlighting a single-dimensional array, we encourage you to
review the official documentation and further explore this
functionality.
test-plot:
# ...
parallel:
  matrix:
    - PTOOL: [gnuplot, matplotlib]
Commit your changes and navigate to your in progress CI pipeline. Keep in mind
the rules established earlier, you’ll need to manually trigger the jobs on the
plot stage:
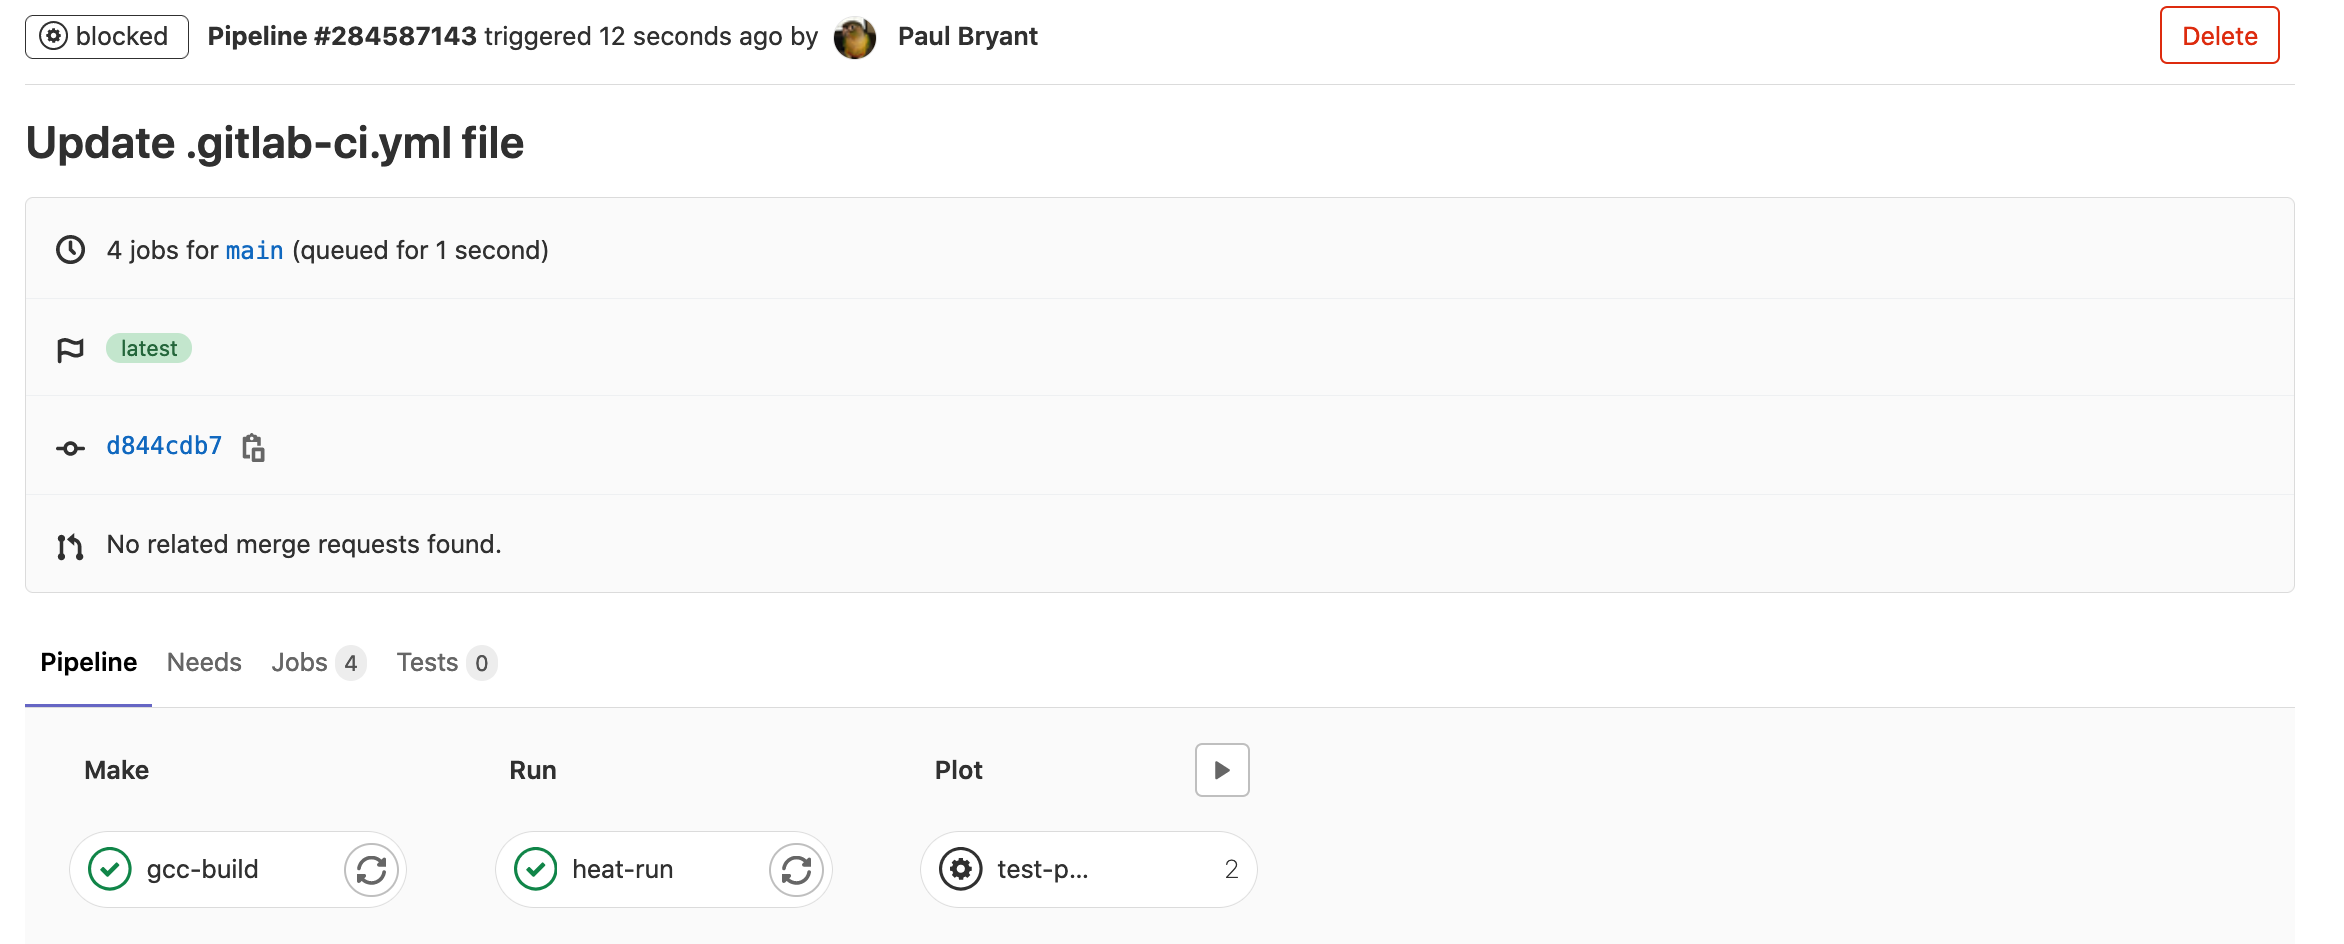
Congratulations, once all your tests have has passed you’ve completed the core sections of this tutorial. However, if your are still interested in continuing with this example we’ve included additional sections below that can be used to expand the already established pipeline with additional interesting features that are available across the range of deployments.
Code Coverage (Badge)
During the introductory section we established a build/test step
that provided a single identifiable value for lines that had been
accounted for during testing:
$ gcovr --xml-pretty --exclude-unreachable-branches --print-summary -o coverage.xml --root ${CI_PROJECT_DIR}
lines: 45.7% (147 out of 322)
branches: 30.9% (278 out of 900)
If you have not already done so add the coverage flag to identify
this values using regular expressions in our gcc-build job:
gcc-build:
  coverage: /^\s*lines:\s*\d+.\d+\%/
  # ...
It is possible to leverage this value to clearly demonstrate the total
coverage and status of our pipeline. Navigate to your project’s
Settings -> CI/CD and Expand the General pipelines section. Here
you will need to identify the Pipeline status and Coverage report
markdown code snippets as we will be using them to update our
README.md.
Note
You may also notice a Testing coverage parsing entry. It is also
possible to update/manage the regular expression for code coverage
via this GUI section. In our example the entry would be:
lines:\s*\d+.\d+\%
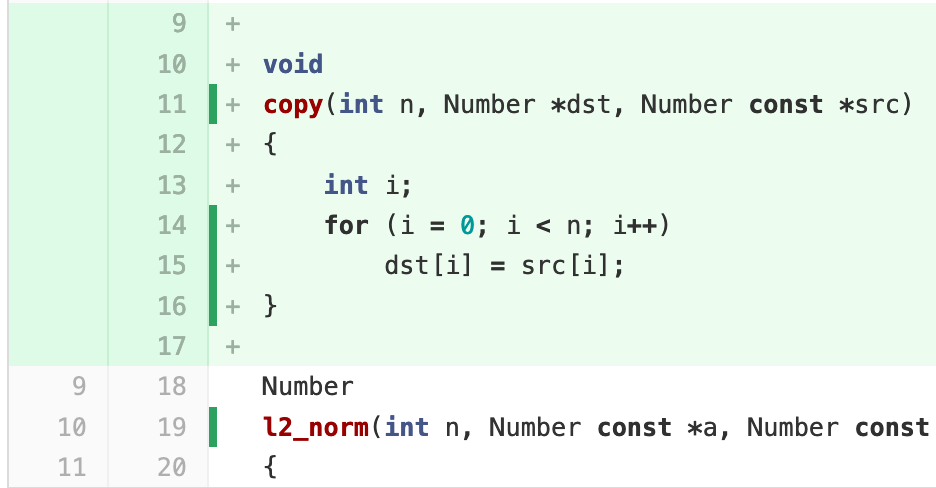
Next you will need to edit the README.md file, we recommend using
the web editor.
Simply copy and paste the earlier snippets near the top of your file:

Once all the changes have been committed and the associated pipeline completed (please note that because of our earlier defined rules you will need to manually trigger several jobs for the badges to appropriately update). Once the pipeline has been completed, navigating back to the Project overview you should see the updated badges in your rendered ReadMe section.
Reporting Build Status
This final additional effort is built upon the Report Build Status to GitLab guide. Please refer back to that guide for complete details.
The goal is to demonstrate a potential workflow that reports the status of a CI job to, in this case, a GitLab server. To greatly simplify the tutorial we’ve chosen to just report back everything to the same server/project you are currently working on.

To being with you will need to create a personal access token with an API scope for your GitLab instance. This will only be required for this tutorial so either set a short expiration date or revoke upon competition. Please make note of this newly created token as we will use it shortly.
This example will make use of a pre-created script (build-status.py)
that you can inspect. It in turn relies on a number of environment
variables to establish the target API URL, Project ID, and of course a
personal access token.
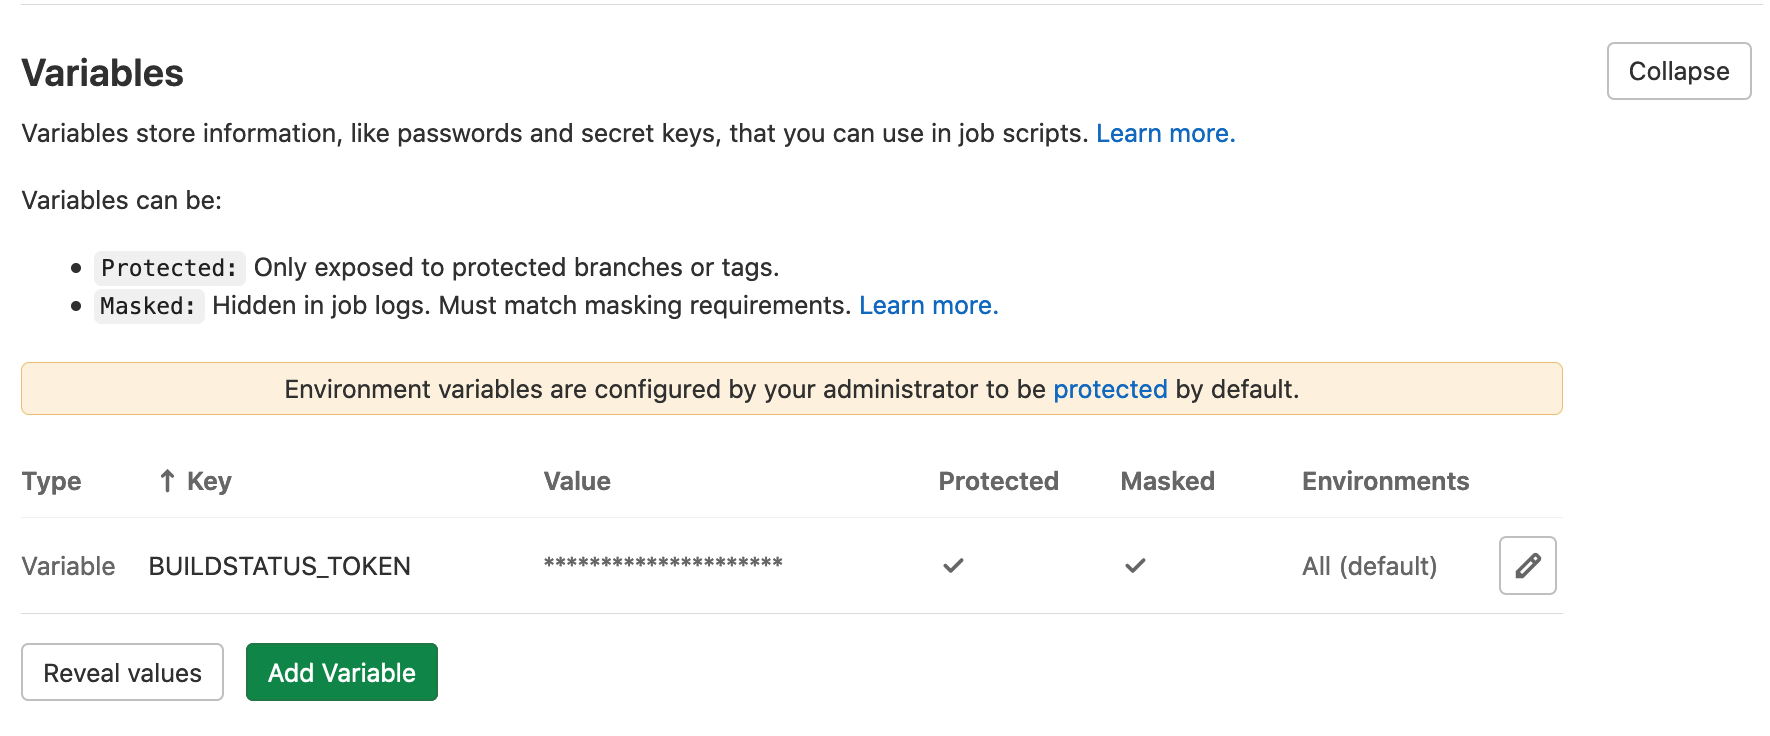
From your project space navigate to Settings -> CI/CD ->
Variables. From there you will want to add a new
BUILDSTATUS_TOKEN whose value is the previously created
personal access token. It is highly encouraged that you choose
to mask this value so it does not appear in the CI job log:
Important
A Masked CI/CD variable will be removed the job log by the
GitLab-Runner prior to results being posted to the server. This
means that it can be observed in other files (e.g., scheduler output
not parsed by the runner, debug logs uploaded to a separate instances,
or commands run on a multi-tenant system). Please be aware of this
when deciding how to use any secret in your CI/CD pipelines.
Next we will want to include
an already created build-status.yaml file. This feature allows use to
specify an external YAML file, that then will be
include:
 - local: 'build-status.yaml'
Before proceeding it is advisable to quickly review the contents of
the build-status.yaml file. You’ll notice that it add three
new jobs that are members of either the .pre or .post stages.
These stages exist by default an will always come at the beginning/end
of a pipeline regardless of other configurations. We’ve also chosen to
use extends with a hidden job, .repost-status, that doesn’t and we’ll
need to create.
# Contents of the build-status.yaml do not directly
# insert into your .gitlab-ci.yml file!
pending:
  extends:
    - .report-status
  stage: .pre

success:
  extends:
    - .report-status
  stage: .post

failed:
  extends:
    - .report-status
  stage: .post
  when: on_failure
Circling back to our .gitlab-ci.yml file we will want to add our
.report-status hidden job there. It is at this point it is important
to highlight that when using include and extends you are able to
merge elements from different files.
.report-status:
  variables:
    BUILDSTATUS_JOB: "CI Tutorial"
    BUILDSTATUS_APIURL: "https://gitlab.com/api/v4"
    # Since we are simply using the same project as the target for the POST
    # request we can leverage existing predefined variables.
    BUILDSTATUS_PROJECT: $CI_PROJECT_ID
  image: python:3
  script:
    - pip3 install requests
    - python3 build-status.py
  tags: [gitlab-org]
Note
Though we are able to leverage extends across multiple files, traditional YAML anchors will only work within a single file.
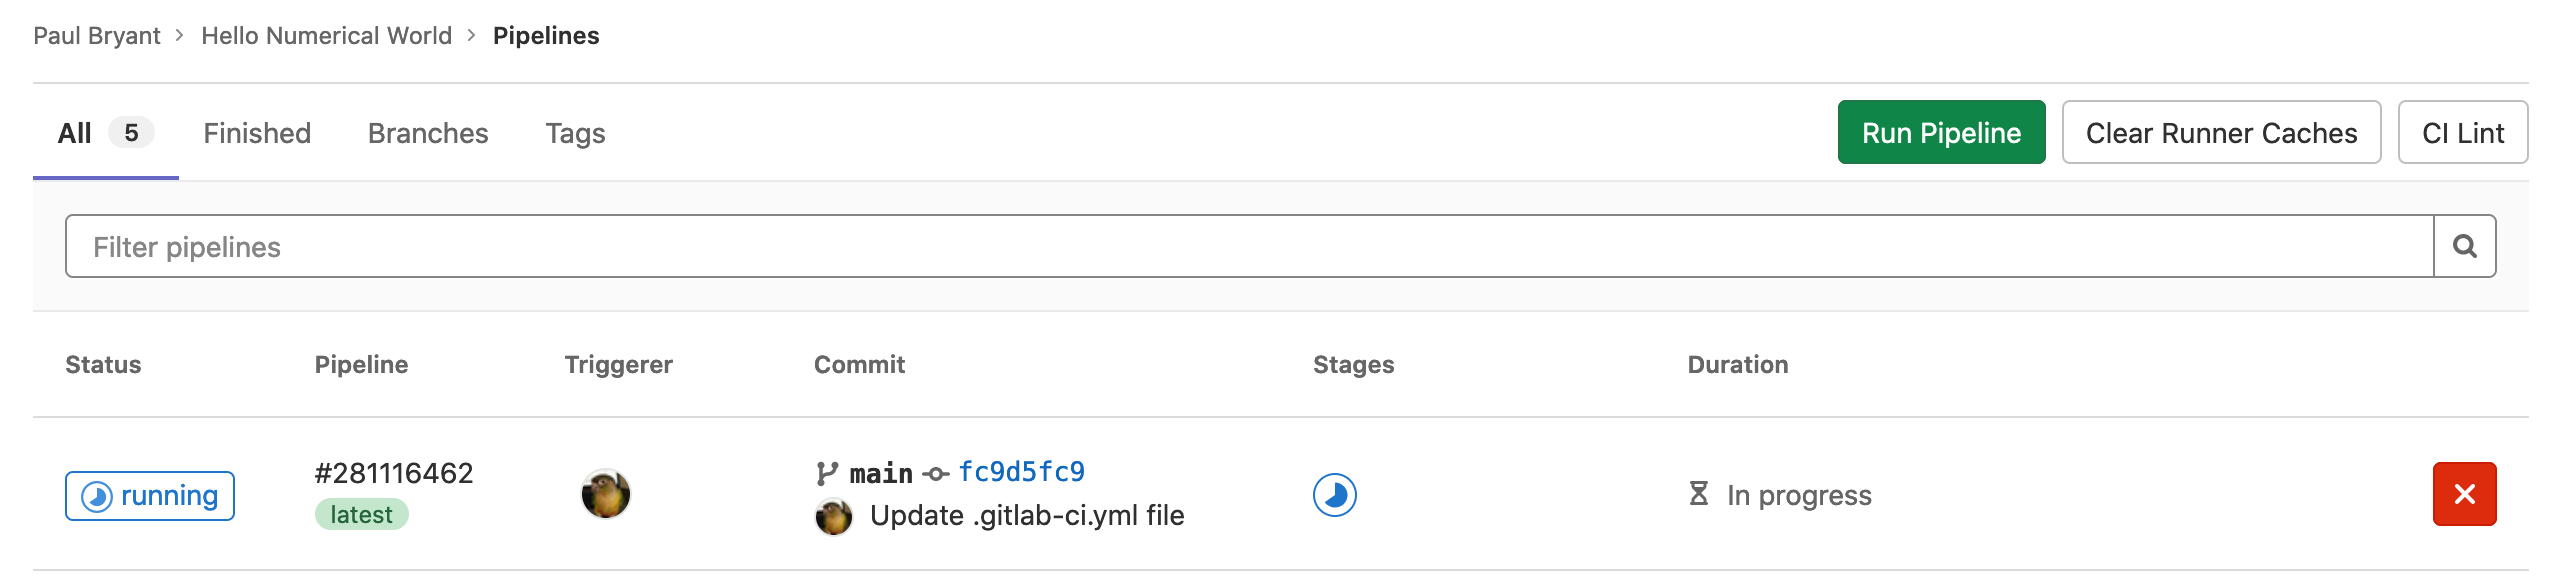
Now commit the changes to your .gitlab-ci.yml file and re-run the complete
pipeline. You should now observe several additional jobs/stages added your
pipeline. Include the CI Tutorial we created with the build-status.py
script:

Note
In an ideal workflow you would wish to target some other centralized instances or test collection mechanism. The specific mechanism of each teams strategy for managing remote test results will differ. We hope this provides a potential example to work from.
Completed - Expanded CI
Reference of the completed Expanded CI Workflow .gitlab-ci.yml file.
 1stages:
 2  - make
 3  - run
 4  - plot
 5
 6variables:
 7  MAKE_FLAGS: "--coverage"
 8
 9.manual-rule:
10  rules:
11    - if: '$CI_PIPELINE_SOURCE == "merge_request_event"'
12    - if: '$CI_COMMIT_BRANCH == $CI_DEFAULT_BRANCH'
13      when: manual
14    - when: never
15
16default:
17  after_script:
18    - hostname
19    - whoami
20  interruptible: true
21  timeout: 30m
22
23gcc-build:
24  coverage: /^\s*lines:\s*\d+.\d+\%/
25  stage: make
26  image: registry.gitlab.com/ecp-ci/ecp-ci.gitlab.io/startup-tutorial/gcc:latest
27  tags: [gitlab-org]
28  before_script:
29    - hostname
30    - echo "${CI_JOB_ID}"
31  script:
32    - make CXXFLAGS=${MAKE_FLAGS} LDFLAGS="${MAKE_FLAGS} -lm" check
33  after_script:
34    - pip3 install gcovr
35    - gcovr --xml-pretty --exclude-unreachable-branches --print-summary -o coverage.xml --root ${CI_PROJECT_DIR}
36  artifacts:
37    expire_in: 3 days
38    paths:
39      - heat
40    reports:
41      cobertura: coverage.xml
42
43heat-run:
44  stage: run
45  image: debian:10-slim
46  script:
47    - ./heat --help
48    - ./heat dx=0.25 maxt=100 ic="rand(125489,100,50)" runame=test
49  artifacts:
50    expire_in: 3 days
51    paths:
52      - test/
53
54test-plot:
55  stage: plot
56  extends:
57    - .manual-rule
58  needs: [gcc-build, heat-run]
59  image: registry.gitlab.com/ecp-ci/ecp-ci.gitlab.io/startup-tutorial/plot:latest
60  script:
61    - make plot PTOOL=${PTOOL} RUNAME=test
62  parallel:
63    matrix:
64      - PTOOL: [gnuplot, matplotlib]
65  artifacts:
66    name: "$CI_JOB_NAME-$PTOOL"
67    expire_in: 3 days
68    paths:
69      - wall_plot.png
70
71# The code below will only function correctly if you completed the
72# 'Reporting Build Status' section of the tutorial as it requires
73# a API token created by the user.
74include:
75  - local: 'build-status.yaml'
76
77.report-status:
78  variables:
79    BUILDSTATUS_JOB: "CI Tutorial"
80    BUILDSTATUS_APIURL: "https://gitlab.com/api/v4"
81    BUILDSTATUS_PROJECT: $CI_PROJECT_ID
82  image: python:3
83  script:
84    - pip3 install requests
85    - python3 build-status.py
86  tags: [gitlab-org]