Admin Tutorial
Target Audience |
Those who wish to deploy Jacamar CI for the first time in a test environment to better understand both this application and the runner’s custom executor. |
Requirements |
GitLab server (version v16+) and Linux system where you can install/manage root processes. |
Estimated Time |
30 minutes |
Using the custom executor provided by the GitLab runner, let alone Jacamar CI can be a substantial change from previous experiences. This tutorial will shepherd you through the process of deploying and configuring the application on a test environment.
This tutorial is organized into several sections:
Once completed you’ll have a deployed runner along with Jacamar CI, capable
of accepting jobs from a GitLab project. Additionally, using
downscoping mechanisms (in this case setuid/setgid), the job
will run as the local user responsible for triggering the pipeline.
All skills developed during this tutorial can be translated directly to deploying your own Jacamar/runner instance on local hardware.
Preparing Your Environment
To begin you’ll need to have access to a Linux system where you have
root permissions. As such we advise using either a virtual machine,
container, or any option where installing/managing system services is
possible without the risk of interfering with production resources.
We’ve already made the container image available on our repository with the GitLab-Runner installed, and all Jacamar build requirements accounted for. You can audit the Dockerfile and build your own version if required.
To start, create an empty srv folder in your current working
directory (mkdir srv) as this will be used for storing runner
configurations and can be mounted in the container.
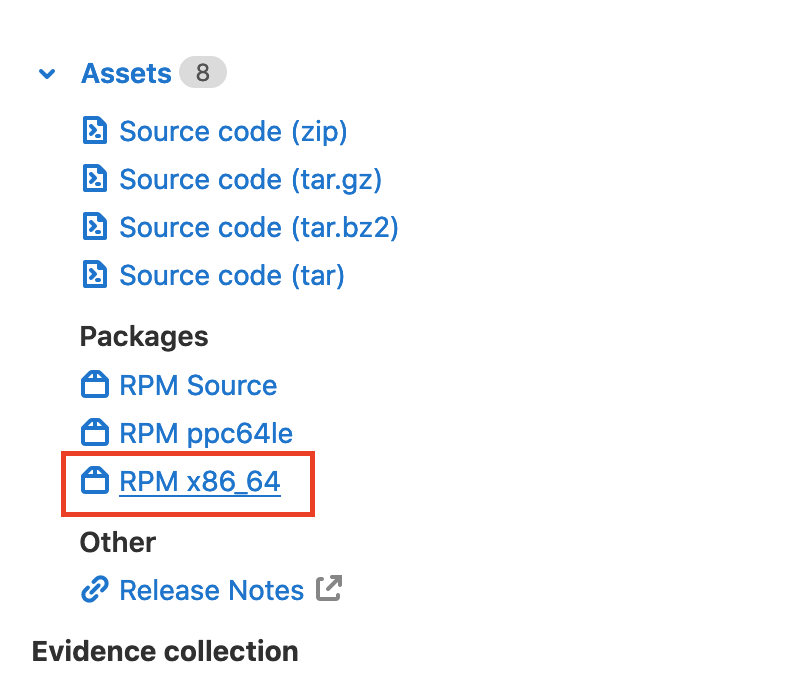
Next navigate to the official release page and download the
latest x86_64 RPM package, saving it into your srv folder.
Now you can run the container using your runtime of choice. In our examples
we will be using Podman, but Docker will also work.
Note
If you’ve run this tutorial before, remove the old image
to avoid potential conflicts, podman image rm ...
$ cd srv
$ podman run -v $(pwd):/etc/gitlab-runner  -it registry.gitlab.com/ecp-ci/ecp-ci.gitlab.io/jacamar-quick-start:latest
If not already found on the system, start by installing the GitLab Runner. Then navigate to the official release page and download the latest version (appropriate for your distribution):
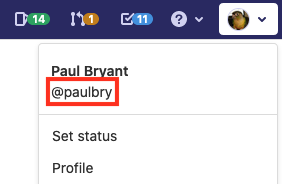
You’ll next want to identify your GitLab user login (without the @ symbol).
This can be found on the web in the top right-hand corner of the GitLab server
web GUI:
Important
A critical assumption for Jacamar CI on production resources is, server accounts are managed using the same underlying systems as those found on the target CI system. Meaning userA on GitLab is the same as userA on the system. Of equal importance is that they cannot influence their username on the GitLab server. For additional details see the Security Considerations in the server documentation. If this is not possible, please take the time to review and potentially test the RunAs Configuration as part of this tutorial.
Create a local user account whose name matches the identified login.
useradd -ms /bin/bash <your-user-here>
Next, we are going to install Jacamar CI via the RPM downloaded
in an earlier step. Before doing so, inspect the RPM and
take note that the potentially privileged jacamar-auth application
will be deployed to a restricted directory:
$ cd /etc/gitlab-runner

$ rpm -qlp jacamar-ci-*.rpm
/opt/jacamar
/opt/jacamar/bin
/opt/jacamar/bin/jacamar-auth
/opt/jacamar/bin/jacamar

$ rpm -i jacamar-ci-*.el7.x86_64.rpm
Finally, verify the environment contains the necessary applications
(gitlab-runner and jacamar) and their versions:
gitlab-runner --version
/opt/jacamar/bin/jacamar --version
From this point your environment is ready. For more comprehensive details on the deployment process, please see our deployment documentation.
Note
Though this document has been written to target the root user there
are additional options for deployment that can be used, such as
setuid w/capabilities. This option will still allow for permissions
to be dropped via the associated downscope configuration.
Registering the Runner
Now we can register the gitlab-runner with a repository on our target
GitLab instance. This will be a project specific runner,
only accessible to that repository. Though we’ll be using the runner’s
interactive registration you’ll need to identify the instance URL and project
registration token (Settings > CI/CD > Runners) before beginning.
It is important that when prompted for a type of executor
you specify custom.
$ gitlab-runner register
Runtime platform                                    arch=amd64 os=linux
Running in system-mode.

Please enter the gitlab-ci coordinator URL (e.g. https://gitlab.com/):
https://gitlab.example.com

Please enter the gitlab-ci token for this runner:
SecretT0k3n

Please enter the gitlab-ci description for this runner:
[hostname]: Jacamar Tutorial Runner

Please enter the gitlab-ci tags for this runner (comma separated):
tutorial

Registering runner... succeeded

Please enter the executor: custom, docker-ssh+machine, docker, docker-ssh, parallels, shell, ssh, virtualbox, docker+machine, kubernetes:
custom

Runner registered successfully. Feel free to start it, but if it's running already the config should be automatically reloaded!
You can verify the registration of the runner in two places:
Check the runner local configuration file (
cat /etc/gitlab-runner/config.toml).Returning to where you obtained the registration token, under the
Runners activated for this projectsection the runner is listed.
Warning
Never divulge the Runner token found in the config.toml.
This should be treated as one would a password as it can be used to
interact with the server (poll and run CI jobs). Currently
GitLab offers few controls to protect this token, though there
are upstream efforts underway to improve this.
Now that the runner is registered we will need to take additional steps
regarding the configuration of the custom executor.
Starting by modifying the [runners.custom] table in the
/etc/gitlab-runner/config.toml file:
[runners.custom]
  config_exec = "/opt/jacamar/bin/jacamar-auth"
  config_args = ["config", "--configuration", "/etc/gitlab-runner/custom.toml"]

  prepare_exec = "/opt/jacamar/bin/jacamar-auth"
  prepare_args = ["prepare"]

  run_exec = "/opt/jacamar/bin/jacamar-auth"
  run_args = ["run"]

  cleanup_exec = "/opt/jacamar/bin/jacamar-auth"
  cleanup_args = ["cleanup", "--configuration", "/etc/gitlab-runner/custom.toml"]
By including the above configuration, you fulfill requirements both of the custom executor and Jacamar CI:
Each stage within a CI job (e.g.,
config,prepare,run, orcleanup) must have an associated executable/script defined. In our case we are usingjacamar-authapplication which will provide the ability to take additional authorization steps as well as a downscoping mechanism (setuid/setgid for this tutorial).Additional arguments can be provided to
jacamar-auth, it requires a sub-command related to the current stage (seejacamar-auth --helpfor details).Finally Jacamar requires its own set of configurations. We include them by specifying the
--configurationargument and the location of the file we will be creating next.
Configuring Jacamar
Though we have a registered runner that is configured to call the
jacamar-auth binary, there is still an additional configuration required.
Due to the number of requirements placed upon Jacamar for maintaining a
secure yet customizable CI workflow, we will need to account for
its distinct configuration.
Let’s create a new TOML file, it should
match the location passed to the --configuration in our
previous step: /etc/gitlab-runner/custom.toml
[general]
  executor = "shell"
  data_dir = "$HOME"
  limit_build_dir = true

[auth]
  downscope = "setuid"

[auth.logging]
  location = "/etc/gitlab-runner/logs"
  level = "debug"
Key |
Description |
|---|---|
|
A required setting that specifies which of the supported executors your deployment will use. |
|
A required setting where all files/directories for a job are stored. Strict ownership ( |
|
An optional setting that uses files locking to claim concurrent directories, limiting the sprawl caused by multiple unique runners. |
|
Target downscoping mechanisms for execution of all CI scripts and generated commands through the auth mechanisms. When using |
|
Identifies where logs will be saved, this can be a distinct file or |
This configuration is the absolute minimum required in order
to accomplish CI with setuid being used to drop permissions
from our root account there are more options
available to you that can be explored later.
Testing your Deployment
Before you can begin testing, you’ll need to start the runner. We are going to do this via CLI but in a production deployment you will most likely leverage a system service.
$ gitlab-runner run
Runtime platform
Starting multi-runner from /etc/gitlab-runner/config.toml...  builds=0
Running in system-mode.
...
Note
You can interrupt the runner at any time with CTRL+C, this will cancel any running jobs and attempt to gracefully shutdown the process.
Now we can test your deployment by creating a .gitlab-ci.yml
file in your project:
test-job:
  tags:
    - tutorial
  id_tokens:
    CI_JOB_JWT:
      aud: https://gitlab.example.com
  before_script:
    - date
    - hostname
  script:
    - id
    - hostname
    # You can use a sleep to allow time to inspect
    # the process locally.
    - sleep 60
  after_script:
    - id
Note
The id_tokens defined in this job are critical to leveraging the
authorization functionality of jacamar-auth. The payload of this
token can be validated as it is signed by the server and is relied
upon to identify the user login who triggered the CI/CD job.
If you want to more closely inspect the payload of the token
simply add the following to your script:
jq -R 'split(".") | .[1] | @base64d | fromjson' <<< "${CI_JOB_JWT}"
Once the file has been committed you can go to CI/CD -> Pipelines and inspect the output for the running job. You should be able to see that the user executing the scripts is the local account we created while Preparing Your Environment.
While the job is running you can inspect the running processes for additional details, for example:
$ ps -e -o uid,pid,cmd --forest
     0  599651  /usr/bin/gitlab-runner run --config /etc/gitlab-runner/config.toml --working-directory /home/gitlab-runner
     0  601642    \_ /opt/jacamar/bin/jacamar-auth run /tmp/custom-executor3093712255/script3564848735/script build_script
  1252  601655      \_ /opt/jacamar/bin/jacamar --no-auth run env-script build_script
  1252  601664        \_ /usr/bin/bash --login
  1252  601677          \_ bash /home/paulbry/.jacamar-ci/scripts/nut0U9c8A/000/admin-tutorial/example/50/build_script.bash
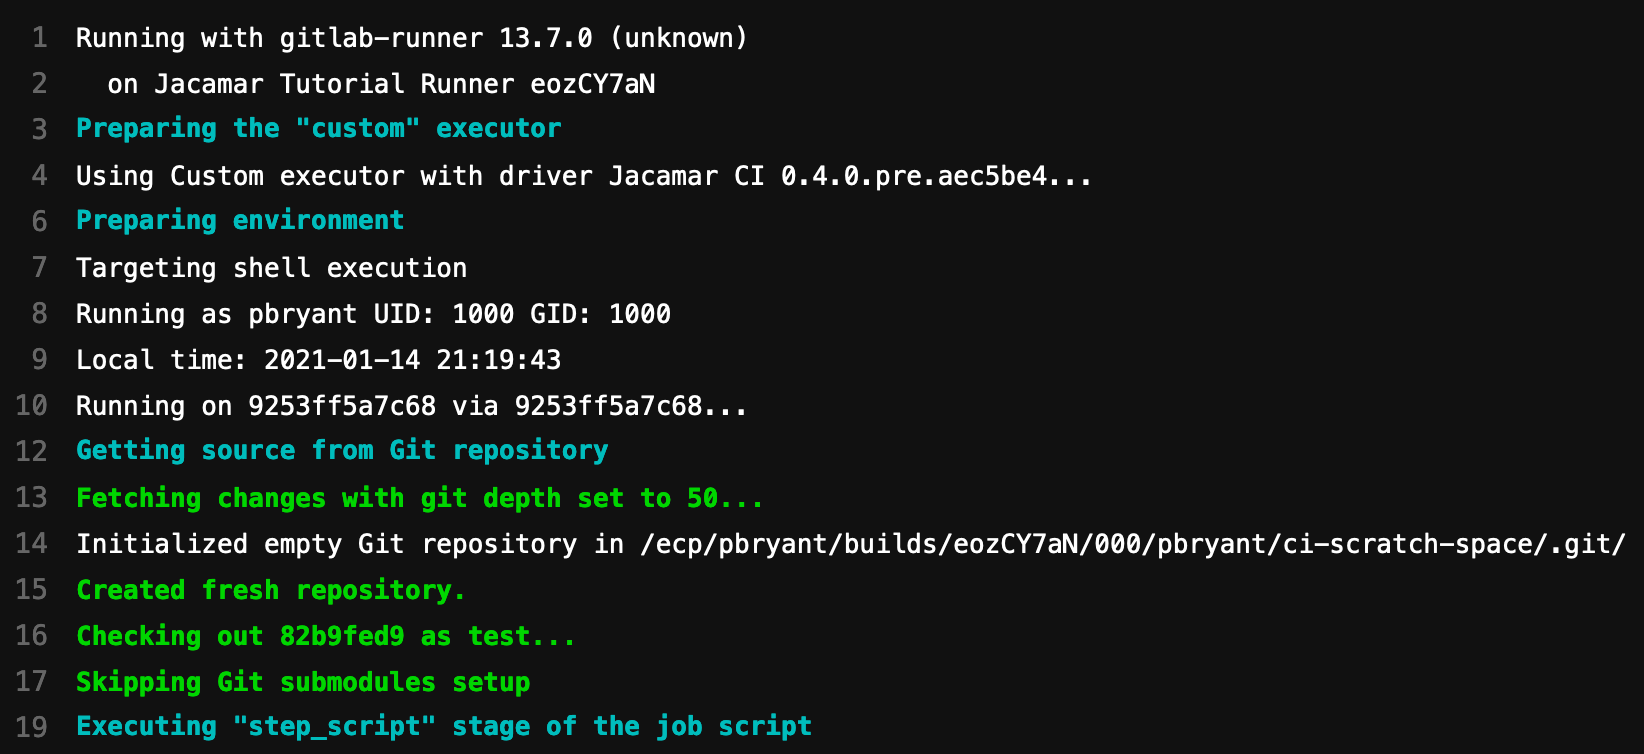
Additional context and job status can be seen from the administrator point
of view if we look back at the gitlab-runner run terminal. If you
experienced any errors in the configuration/deployment this is where
you’ll be able to best identify them.

If you did run into issues with the deployment, we recommend first verifying that all configurations highlighted during this tutorial are reflected locally. You can also reference the troubleshooting documentation for common topics.
Once the CI job has completed, examine file permissions for all CI files generated as part of your test job according to the data_dir:
cd /demo/<your-user-here>
ls -la
Next Steps
From here feel free to edit the configuration and further examine the application and how user permissions are managed.
Start the GitLab-Runner with the debug flag (
gitlab-runner --debug run) to observe all potential information.Further review the running process and any Jacamar generate logging.
Remove your user account (
userdel <your-user-here>), to observe what error will you encounter as the user.Display the un-obfuscated error messages generated during authorization with the user account still removed to see additional context when the job inevitably fails. By default Jacamar is fairly restrictive with the errors it passes along to the user.
Review the Job Logs
In our example we are simply dump the logging generated by Jacamar
to a file (/etc/gitlab-runner/logs). In a production instance
you would likely utilize the default systemd location.
There is a lot of details found here regarding the CI job that are not captured in the GitLab Runner logs, including a clear message regarding the specific local account that has been authorized:
$ cat /etc/gitlab-runner/logs | grep 'authorized for CI' | jq
{
  "time": "2025-08-19T14:09:07.162912479Z",
  "level": "INFO",
  "msg": "local account (paulbry) authorized for CI job execution",
  "job": 42,
  "runner": "abcd1234",
  "stage": "config_exec",
  "processID": 600005,
  "hostname": "example"
}
Using a Batch Executor
Though outside the scope of this guide, we support basic interactions with
a number of batch schedulers, primarily slurm, flux, and PBS.
Utilizing one of these options is as simple as changing the target
executor in the Jacamar CI configuration:
[general]
  executor = "slurm"
Jobs will now be submitted to the underlying scheduler with one CI
job equating to a single job submission (e.g., sbatch when using
Slurm). The exception to this is if you choose to leverage the
scheduler actions functionality.
In production instances you’ll often find there is value
in offering multiple types of runners to your users. So
a runner with the capabilities to use a batch executor could be
paired with a traditional shell.
Utilize RunAs Validation
Though it may be preferred that a user account on GitLab directly corresponds to a single account on the system, we recognize this isn’t always feasible. In those scenarios, the responsibility for those mappings falls to the runner administrator using the RunAs Configuration.
The script could be as simple as this:
#!/bin/bash

if [ "$1" == "gitlabUsername" ] ; then
  echo '{"username":"localUsername"}'
  exit 0
fi
exit 1
Then you would update your Jacamar CI configuration to reference this newly created Bash script:
[auth.runas]
  validation_script = "/path/to/runas.bash"
With this in place, jacamar-auth will now call this script
during the authorization process for each job. This flow can be
extended in a number of cases, for instance if you want to take
additional steps to validate a user has additional permissions
or group membership before job runs.