Empowering HPC Projects with Jacamar CI and GitLab
Target Audience |
HPC code teams that wish to begin using GitLab CI as part of their testing strategy using HPC container runtimes and Spack. |
Requirements |
Hands-on sections of the tutorial have been written for generic HPC resources and several different container runtimes. You only requires a compatible browser and a basic understanding of GitLab to follow along. |
Estimated Time |
1 to 1.5 hours |
Getting Started
Note
This tutorial was designed specifically for the resources available to the tutorial attendees at NLIT 2025. We plan on integrating feedback and providing it as a self-hosted option in the future.
Before getting started it is important to note that this tutorial assumes a familiarly with GitLab and the basic concepts of their CI/CD pipelines. We will attempt to link to supporting documentation wherever possible that provide additional context regarding officially supported features that make these workflows possible. However, if you are interested in more in-depth tutorials regarding general GitLab functionality we highly encourage you to explore their officially supported options:
To get started please connect to the tutorial GitLab instance (tutorial-gitlab.jacamar-ci.org ) using the provided credentials.
Navigating GitLab CI
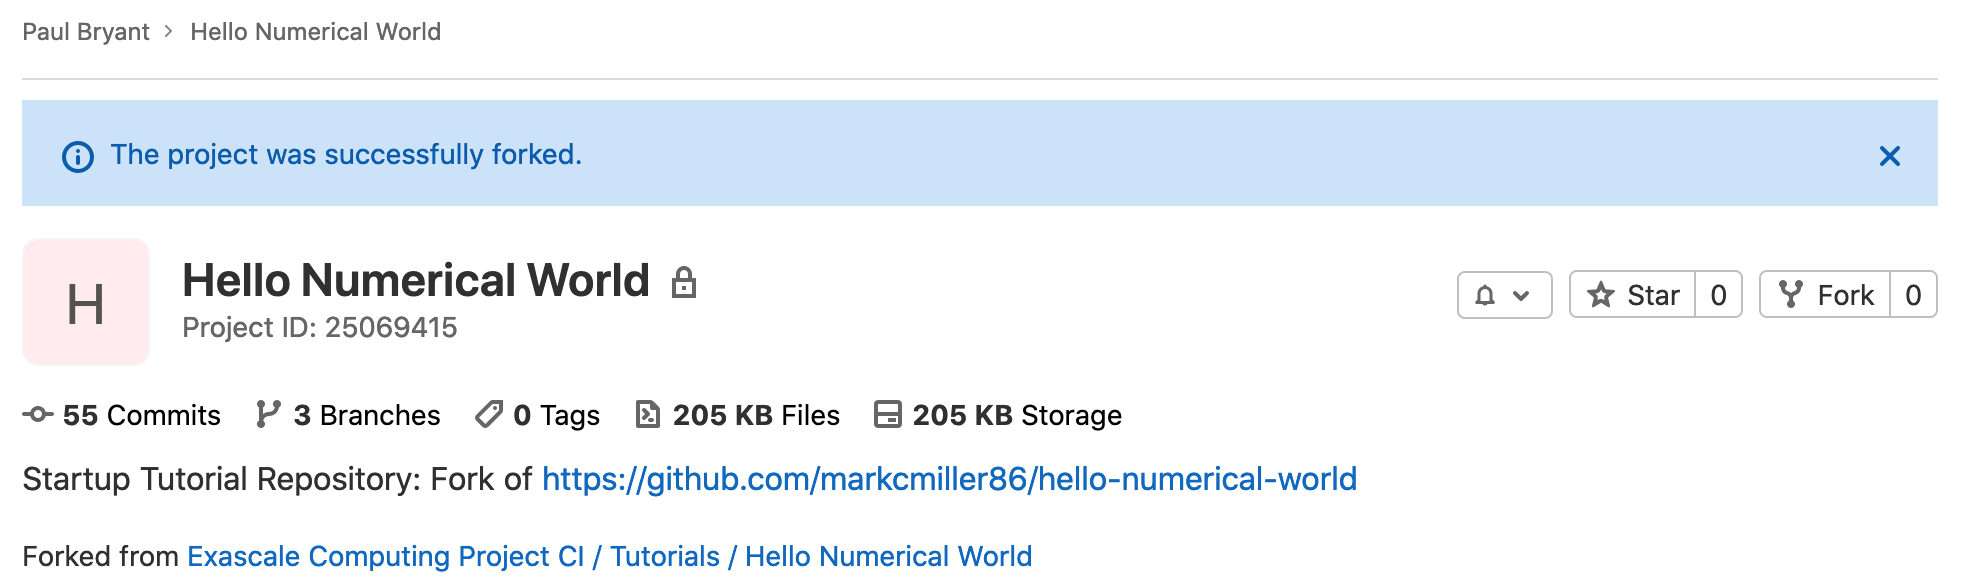
To begin you will need to fork the tutorial project into your user namespace:
Upon successfully forking the project you will be automatically redirected:
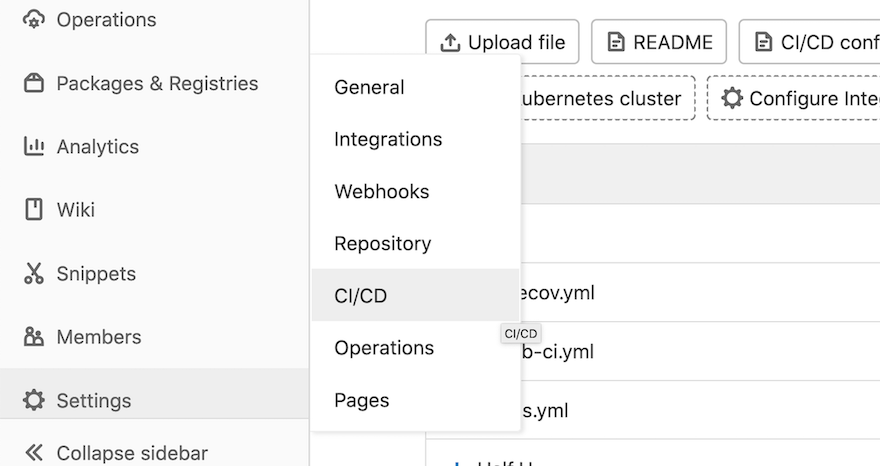
Begin by navigating to Settings -> CI/CD, depending
on your screen size, you may need to un-collapse the sidebar.
Once in the CI/CD Settings page you will notice a number of configuration options. We encourage you to explore these if time permits, but there are several that are important to highlight. In the General Pipelines section, some key parameters are:
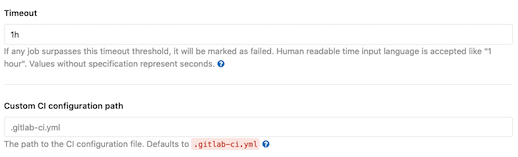
Timeout: This is the default timeout (one hour) for each CI job. A CI job, however, is something quite different from the jobs run by a scheduler (e.g., wallclock) on behalf of a batch executor. It is important not to confuse these two wholly different timeout parameters. This value can also be overridden at the job level; however, neither case can exceed the runner’s maximum timeout.
Custom CI Configuration Path: This is the default path within the repository at which to find the YAML file controlling CI/CD behavior. The default is
.gitlab-ci.yml. This can useful to alter when managing CI across multiple mirrors.
If we Collapse the General section and Expand the Runners section,
we can view available runners (and register new ones). This page shows the
runner’s current status (hopefully a green dot indicating it is healthy).
There is also a list of tags associated with the runner. Tags are defined
by whomever administers the runner and are used in .gitlab-ci.yml files
to target CI/CD jobs to specific runners. Knowing how to find these
tags is important.
Note
In any future work with CI, regardless of platform, it is important to notes that it is your responsibility to observe all rules appropriate for the type of code/data you are managing. Please consult with your management and facility policies where required.
Hello, Container!
Important
This tutorials is centered around using an underlying HPC container runtime coupled with the defined image in order to introduce a number of exciting features and potential workflows. In your own deployments/pipelines you can simply choose to use the host system to realize your project goals as that will always be supported.
Begin by navigating back to the project homepage, this can be accomplished by clicking Hello Numerical World found on the left sidebar. We encourage you to utilize the Web IDE <https://docs.gitlab.com/user/project/web_ide/> for this demo, though there or other method available by which you can manage your project’s code:

To begin lets update the .gitlab-ci.yml file to run a basic job that
utilizes Jacamar CI on the host system:
default:
  tags: [jacamar, shell]
  id_tokens:
    CI_JOB_JWT:
      aud: https://tutorial-gitlab.jacamar-ci.org
  interruptible: true

hello-host:
  script:
    - whoami
    - cat /etc/os-release
You’ll want to make note of several keywords defined as they are important to realizing more advanced CI/CD workflows:
default: Global defaults applied to every job if not already defined.
tags: Used to target specific runners (the complete list of available runners can be found under your project’s
Settings -> CI/CD -> Runners).id_tokens: Required by Jacamar CI to realize authorization for user jobs, see our related guide for complete details.
interruptible: Auto cancel redundant pipelines, this is useful to avoid wasted cycles.
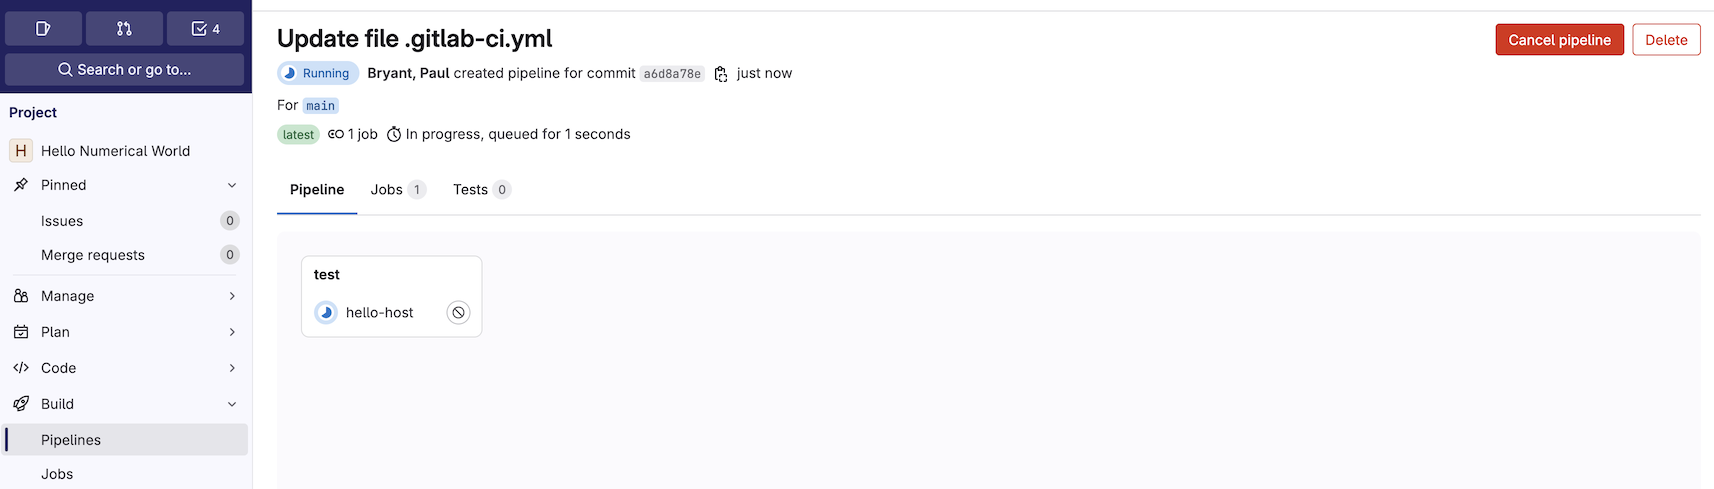
Now simply commit the code to your project’s main branch
and the pipeline will being. From another tag you can navigate
to your project Build -> Pipelines to observe the running pipeline:
If you dive into the hello-host job you’ll notice helpful
details about the Jacamar CI deployment along with the fact that
your job is running under your local user account. The
authorization and resulting downscoping of permissions is crucial
to realizing a runner resource on an HPC environment that
is likely shared by a number of user/projects. Jacamar CI
will always attempt to provide your job with an environment
that is the equivalent to what you would expect if you simply
logged into the machine.
Preparing environment
Targeting shell executor
Allowed run mechanisms: charliecloud, podman, apptainer
...
$ whoami
tutorial01
Note
The GitLab Runner scripts (e.g., script) Jacamar CI executes
will always be written for a Bash shell.
Now that we have a basic job running on a shell executor as our
user, lets take a first look into the supported run mechanisms
that allow us to utilize a local container runtime to seamlessly
run our GitLab script in a target image:
hello-container:
  image: quay.io/almalinuxorg/almalinux:latest
  script:
    - id
    - cat /etc/os-release
The act of introducing an image to your CI job would result in the
first run mechanism listed being utilized; however, you can override this
default behavior through the JACAMAR_RUN_MECHANISM variable. For
the purposes of this tutorial you’ll want to define this variables so
it is accessible across all jobs:
variables:
  JACAMAR_RUN_MECHANISM: charliecloud

  # If you ever need to exert additional control over your
  # job's 'ch-run' command you can use the follow variable
  # to pass additional CLI arguments.
  # JACAMAR_CI_CHARLIECLOUD_ARGS: '...'
Please see the Charliecloud documentation for additional details
on the project and options available to you for interacting with
ch-run.
variables:
  JACAMAR_RUN_MECHANISM: podman

  # If you ever need to exert additional control over your
  # job's 'podman run' command you can use the follow variable
  # to pass additional CLI arguments.
  # JACAMAR_CI_PODMAN_ARGS: '...'
Please see the Podman documentation for additional details
on the project and options available to you for interacting with
podman run.
variables:
  JACAMAR_RUN_MECHANISM: apptainer

  # If you ever need to exert additional control over your
  # job's 'podman run' command you can use the follow variable
  # to pass additional CLI arguments.
  # JACAMAR_CI_APPTAINER_ARGS: '...'
Please see the Apptainer documentation for additional details
on the project and options available to you for interacting with
apptainer run.
Now feel free to commit the changes, triggering yet another
CI pipeline. If you investigate the results of the hello-container
job we just introduced, you’ll clearly see that the target image
has been pulled and used to run our script:
Using Custom executor with driver Jacamar CI 0.26.0.pre.0cbaca9...
Charliecloud support enabled
Target Image: quay.io/almalinuxorg/almalinux:latest
...
$ cat /etc/os-release
NAME="AlmaLinux"
VERSION="9.5 (Teal Serval)"
...
It’s important to understand that when using an image with Jacamar CI only
the user generated scripts (before_script + script, after_script,
and any step_scripts) are launched within the resulting container. All
other actions either occurs on the host system itself or using an image
defined by the runner administrator.
Batch executor support
Jacamar CI can also support interacting with an underlying scheduler,
primarily SLurm, Flux, or PBS. At the most basic level we construct
a job submission command utilizing the runner provided script, defaults
enforced by Jacamar to help monitor job status, and any arguments
you provided in the SCHEDULER_PARAMETERS variable.
hello-compute:
  # Refer back to the earlier sections regarding identifying available
  # runners to see how we selected these tags.
  tags: [jacamar, slurm]
  variables:
    SCHEDULER_PARAMETERS: "-n2 --time=1"
  script:
    - hostname
    - echo $SLURM_TASKS_PER_NODE
  after_script:
    - hostname
When you examine the resulting job you’ll notice that the
hostname for the script portion is one of the available
compute nodes, while the after_script is login node where
the runner is hosted. This is by design as these are two distinct
shell scripts that the GitLab Runner will generate.
Slurm job command: sbatch ...
Submitted batch job 16
$ hostname
pall-st-c54xlarge-1
$ echo $SLURM_TASKS_PER_NODE
2
Slurm job ci-84_1746380249 state: COMPLETED
Running after script...
$ hostname
ip-10-0-0-254
Important
As mentioned earlier, the job timeout is distinct from our --timeout=1
we defined for the Slurm submission. The runner level timeout begins as soon
as the job is accepted and any time accrued while waiting in queue counts.
For this reason you may wish to extend the CI timeout long enough
to account any such wait.
Troubleshooting your YAML
It is not uncommon to see the following error message when examining the Pipelines page:

Hovering your mouse over the yaml invalid tag can provide additional
context regarding the error. Though, a more beneficial troubleshooting method
involves leveraging GitLab’s builtin CI linter. The linter can be found within
the pipeline editor:
In our above example the error encountered is a missing
stages parameter, leading to the following error:
gcc-build job: chosen stage does not exist; available stages are .pre, build, test, deploy, .post
Reintroducing the code will correct this error. The linter is only designed to identify mistakes in the GitLab YAML syntax and any others error, even if they will lead to failed jobs, will not be identified.
Spack CI
Spack is a flexible package manager offering a broad range of functionality to build a wide array required scientific software. Spack CI can be used in your pipeline to seamlessly manage your project’s dependencies thanks to their integration with GitLab CI.
To begin, remove everything we had previously added to our
.gitlab-ci.yml and define a new default and stages:
default:
  tags: [jacamar, shell]
  id_tokens:
    CI_JOB_JWT:
      aud: https://tutorial-gitlab.jacamar-ci.org
  interruptible: true

stages:
  - generate
  - build
For your first job we will want to establish generate a
downstream pipeline using spack ci generate. Begin
by creating the generate-pipeline job and targeting
a Spack image we have setup for the purposes of this tutorial:
generate-pipeline:
  stage: generate
  image:
    name: registry.gitlab.com/ecp-ci/tutorials/hello-numerical-world/spack:0.23.1
    entrypoint: ["/bin/bash", "-l", "-c"]
The Spack team manages a range of supported images on their DockerHub. If you attempt to setup a similar workflow on your project please use one of their supported images for your workflows.
For the next step we will want to define a specific volume that will
be mounted (e.g., --volume or --bind). All that matters is that
the variable is prefixed with JACAMAR_VOLUME, every environment
variable with this prefix will be mounted using the associated container
runtime option:
generate-pipeline:
  ...
  variables:
    JACAMAR_VOLUME_0: /home/<username>:/home/<username>
We will create the shared build_cache in the mounted volume and ensure
that it is available to all future jobs. Now that we have a shared folder
that can be made available to every job in the Spack generated pipeline
we need to actually generate it:
generate-pipeline:
  ...
  script:
    - source /opt/spack/share/spack/setup-env.sh
    - mkdir -p /home/paulbry/build_cache
    - |
      spack env activate --without-view .
      spack ci generate \
        --artifacts-root "${CI_PROJECT_DIR}/jobs_scratch_dir" \
        --output-file "${CI_PROJECT_DIR}/jobs_scratch_dir/pipeline.yml"
  artifacts:
    paths:
      - jobs_scratch_dir/
Since we’ve built the desired pipeline and captured it as artifacts
we can now realize the job responsible for starting our
downstream pipeline. We need to utilize the trigger keyword
and reference the pipeline.yml that spack ci
generated:
build-jobs:
  stage: build
  trigger:
    include:
      - artifact: jobs_scratch_dir/pipeline.yml
        job: generate-pipeline
    strategy: depend
With that job in place we can turn our attention to the
Spack environment itself but editing the spack.yaml file. Below
we’ve included an almost complete file for the purposes of this
tutorial. Please note, that similar to the earlier JACAMAR_VOLUME_0
variable you will need to update the instances of <username> to
align with your tutorial account name.
spack:
  view: false
  concretizer:
    unify: true

  mirrors:
    # Every Spack CI requires a 'buildcache-destination' target, in our case
    # we are simply going to use the folder we have chosen to mount using our
    # JACAMAR_VOLUME_0 variable.
    buildcache-destination:
      url: file:///home/<username>/build_cache
      signed: false
    # Spack also supports using an OCI registry as a target build cache, this
    # is an excellent way to easily distribute builds across your team.
    # https://spack.readthedocs.io/en/latest/binary_caches.html#oci-docker-v2-registries-as-build-cache
    hello-numerical-world:
      url: oci://registry.gitlab.com/ecp-ci/tutorials/hello-numerical-world/spack-cache
      signed: false

  # This represents the list of specs we wish to build, each dependencies
  # in this spec will be realized as its own CI job. The defined build_cache
  # acting as the mechanism packages an access their specific dependencies.

  specs:
    - readline

  ci:
    rebuild-index: True
    # The pipeline-gen section containers all the information Spack required to
    # general a valid GitLab pipeline for our requests spec.
    pipeline-gen:
      - any-job:
          tags: [jacamar, shell]
          variables:
            JACAMAR_VOLUME_0: /home/<username>/build_cache:/home/<username>/build_cache
          before_script:
            - source /opt/spack/share/spack/setup-env.sh
          id_tokens:
            CI_JOB_JWT:
              aud: https://tutorial-gitlab.jacamar-ci.org
          image:
            name: registry.gitlab.com/ecp-ci/tutorials/hello-numerical-world/spack:0.23.1
            entrypoint: ["/bin/bash", "-l", "-c"]
     # Though unable to realize in this tutorial, it is possible to target different
     # runners for specific actions. For instance, utilizing a more generic runner
     # for "noop" jobs could save time during busy queues. Consult the Spack documentation
     # for more details and potential use cases.
     # - noop:
     #   tags: [k8s]
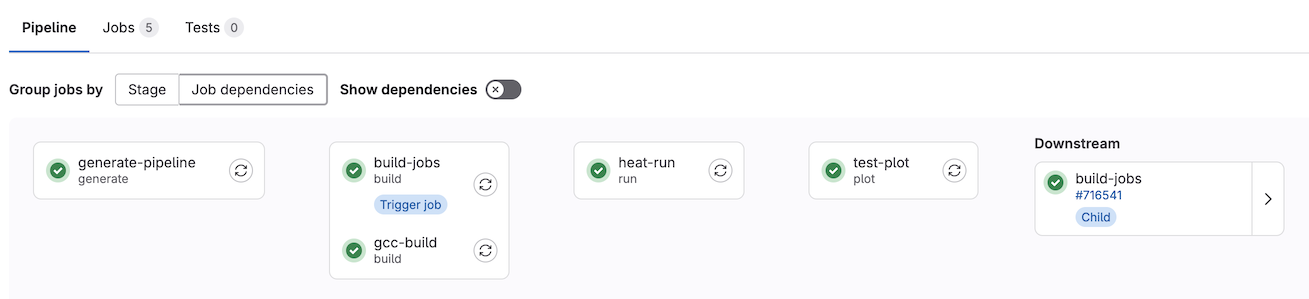
At last you can commit the changes and trigger the resulting pipeline. At this
point when you review it, you’ll be able to observe a downstream pipeline
running thanks to the trigger you defined in the build-jobs.

The generated pipeline components will match what you observe if you generate a graph for you target spec(s) locally, with each component (dependencies included) building in their own job:
$ spack graph readline
o readline@8.2/gakgvzg
|\
| |\
o | | ncurses@6.5/opxqzn4
|\| |
|\ \ \
| | |/
| |/|
o | | pkgconf@2.2.0/wap5mu7
|\| |
| |/
|/|
| o gmake@4.4.1/di47qxl
|
o gnuconfig@2022-09-17/gnxqjlq
The flexibility and most important reusability this method of dependency management provides can be incredibly valuable for a wide range of code teams. Spack ensures that successful builds are cached as part of this process, meaning you can easily access and use them beyond GitLab CI/CD.
Limit Job Execution
Even though Spack offers mechanisms to prevent running unnecessary jobs there will be scenarios where you wish to exert additional control based upon some series of rules targeting CI/CD variables. An easy way to add this to multiple potential jobs is by using extends functionality.
Start by defining a hidden job titled .spack-ci-rules to your
.gitlab-ci.yml file:
.spack-ci-rules:
  rules:
    - if: $CI_COMMIT_BRANCH == $CI_DEFAULT_BRANCH
      changes:
        - spack.yaml
    # The presence of rules implies the default behavior is
    # the job will not run.
    # - when: never
No you can add a reference to .spack-ci-rules to any job
you wish to restrict using extends:
generate-pipeline:
  ...
  extends:
    - .spack-ci-rules

build-jobs:
  ...
  extends:
    - .spack-ci-rules
Once you commit these modifications there will be no pipeline
spawned. And throughout the rest of the tutorial, unless you
modify the .gitlab-ci.yaml file these jobs will not run.
You can also take this sort of logic a step further by using the
include keyword. This allows you to reference CI files that
are managed separately from you .gitlab-ci.yml files, even
those managed in other repositories.
Project Integration
Note
We are excited to be using a mirror of the
Hello Numerical World
project. The application associated with this project solves a one
dimensional heat conduction problem. For complete details, including
the associated Hands-On Lesson please see the project’s README.md.
Now that we have compiled some of the necessary dependencies let’s turn our
attention to realizing the primary build/test elements of a pipeline
for the example project. Begin by expanding the stages in our
.gitlab-ci.yml file:
stages:
  - generate
  - build
  - run
  - plot
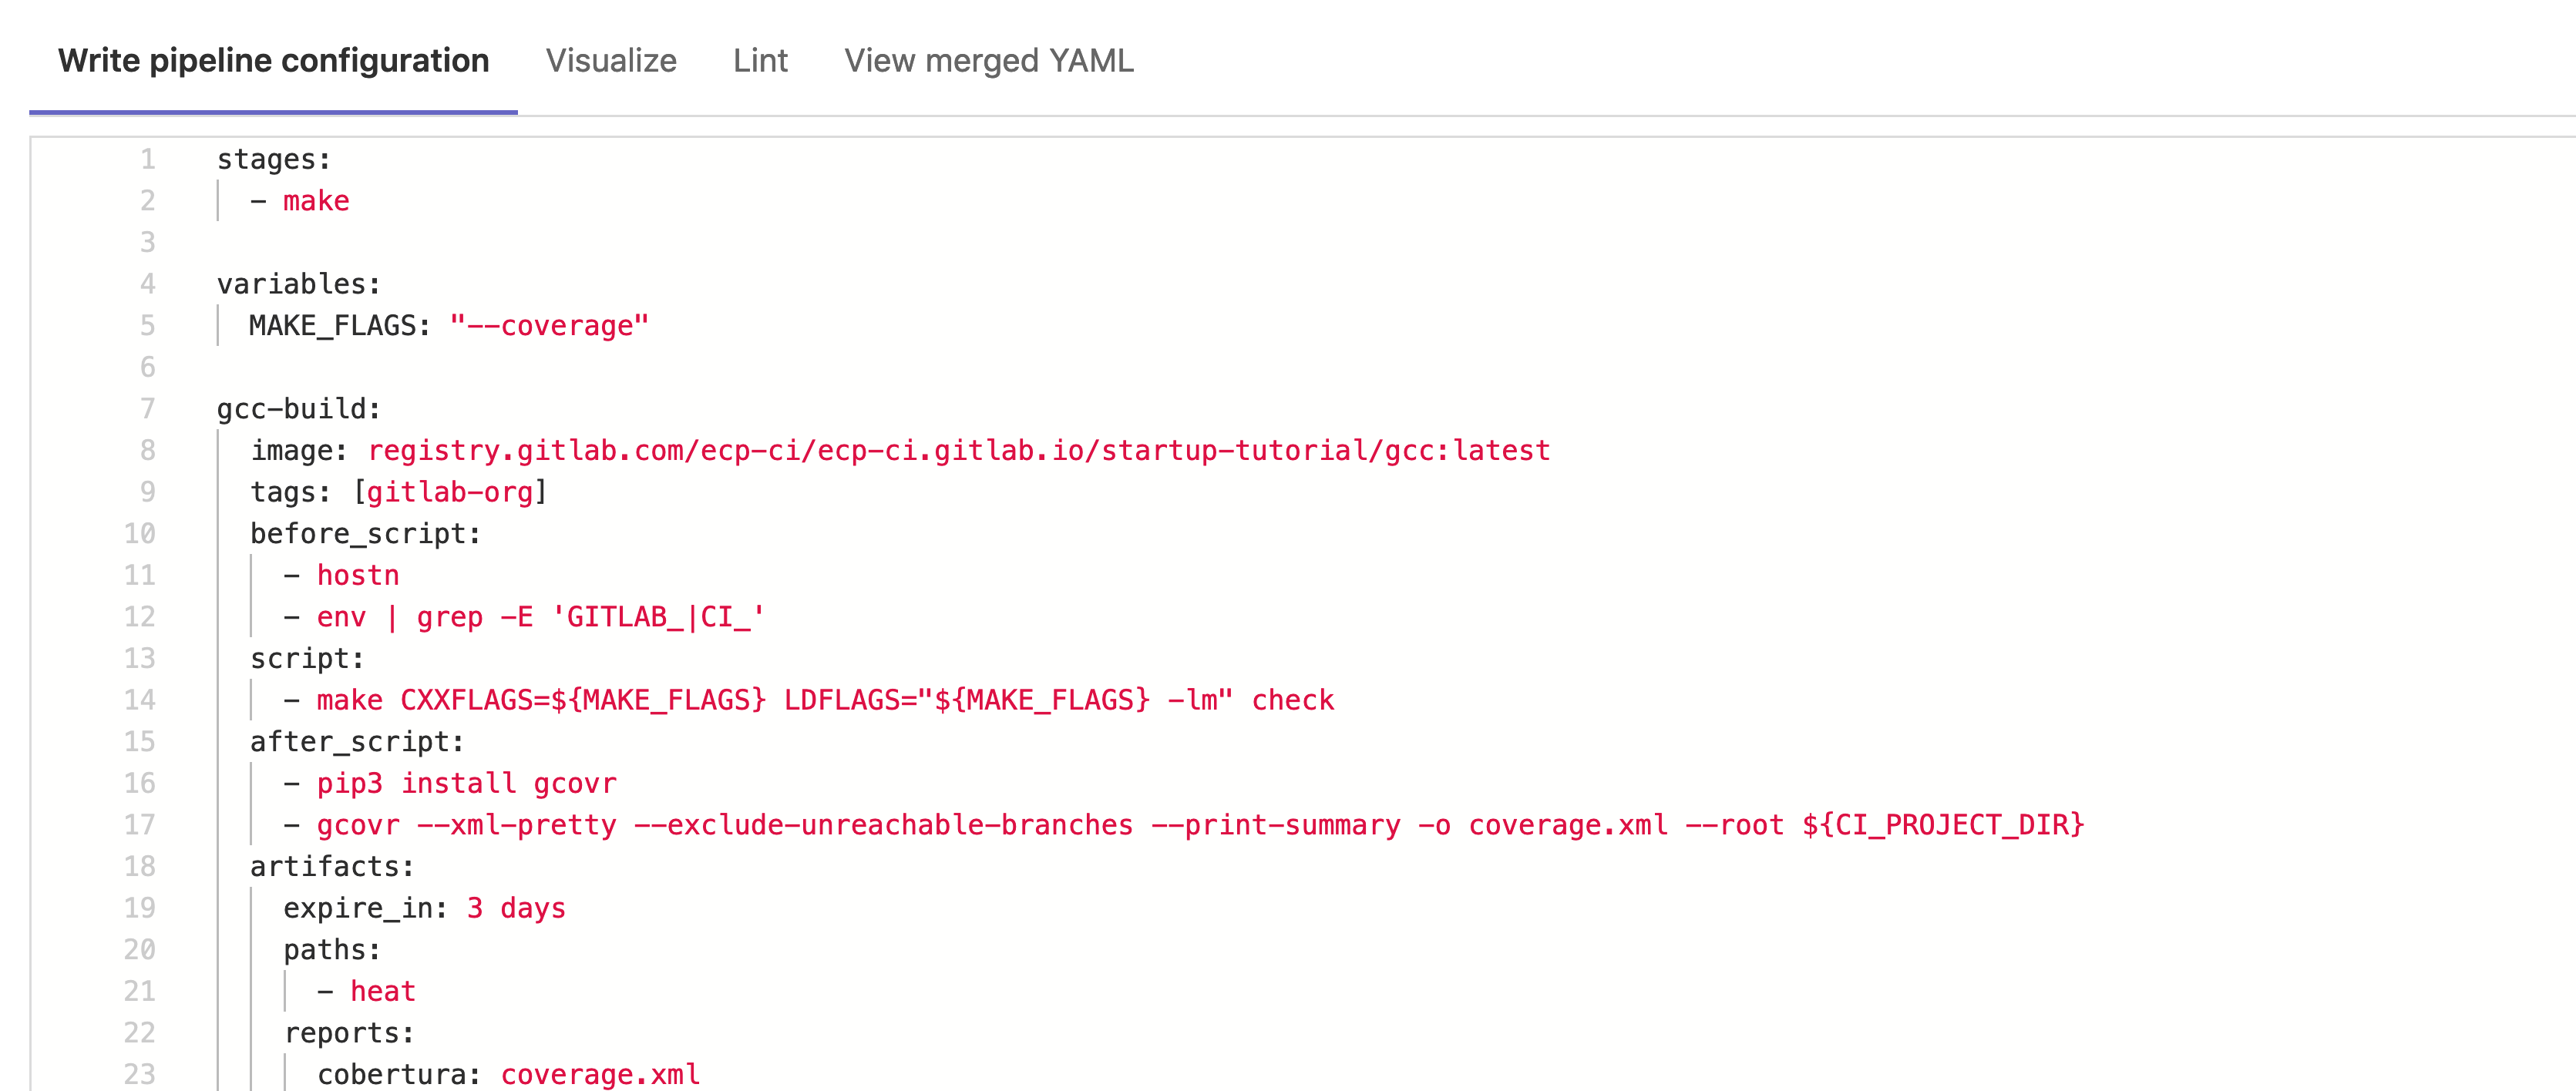
Next we will be adding a gcc-build job, which as the name suggests will
compile our application. We’ve already create a container image with
gcc and gcovr installed and ready to use for this job:
gcc-build:
  stage: build
  script:
    - make CXXFLAGS="--coverage" LDFLAGS="--coverage -lm" check
  after_script:
    - gcovr --xml-pretty --exclude-unreachable-branches --print-summary -o coverage.xml --root ${CI_PROJECT_DIR}
Important
The difference between the container based CI you are using
during this tutorial and running on traditional HPC test
resources is the image: key. As containers are
fundamentally offering us a specific software environment, the
equivalent for our gcc-build might look something
like:
gcc-build:
  before_script:
    - module load gcc/11.2.0
There are some important aspects of the after_script as compared to anything
defined in the before_script + script sections. There are a completely
separate shell, that as the name implies run after the other has completed.
However, it will also run in cases where the build script as failed or the job
was canceled while that script was running. Unfortunately, its limited to a
5 minute runtime, meaning its primary value is in organizing/managing job
details.
Now that our job is creating a compiled binary along with a coverage report
(coverage.xml) we will want to capture theses are artifacts:
gcc-build:
  ...
  artifacts:
    expire_in: 1h
    paths:
      - heat
    reports:
      coverage_report:
        coverage_format: cobertura
        path: coverage.xml
  coverage: /^\s*lines:\s*\d+.\d+\%/
Note
Using artifacts may not be suitable for all HPC project requirements as there are limits to the maximum size you can upload that are managed by the serve administrators. For more complete details and other options please see the Artifacts, Caching, and Local Storage for HPC Project guide.
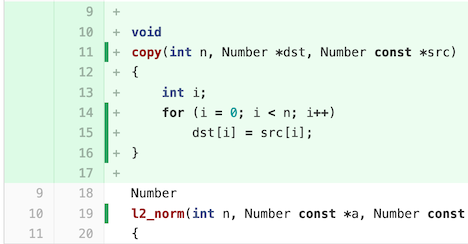
In our example, in addition to capturing the compiled heat application,
we’ve specified the Coberture report type as it offers a mechanisms
for identifying code coverage in merge requests:
There are a range of potential artifact reports
that could improve your team’s workflows, and are worth investigating. Be
aware though that some such tools require a licensed version of the server.
In our case we rely on gcovr to generate the coverage.xml report file.
The coverage key is much easier to support as it offers a simple way to
define a regular expression that is used by the server to identify the
total test coverage over your code (45.7% in our example):
$ gcovr --xml-pretty --exclude-unreachable-branches --print-summary -o coverage.xml --root ${CI_PROJECT_DIR}
lines: 45.7% (147 out of 322)
branches: 30.9% (278 out of 900)
Lets next write a heat-run job that we want to run immediately after
the gcc-build is completed. This is accomplished by defining needs,
thus creating a directed acyclic graph and ensuring the artifact containing
the heat application will be downloaded.
We are going to run a simple command with our application that will
demonstrate a linear steady state (please see the Hands-On Lesson
for more potential details). This will generate
a series of output files describing the curve in the test/
directory. To allow further examination of these results
we should gather them using GitLab’s cache mechanism:
heat-run:
  stage: run
  tags: [jacamar,slurm]
  variables:
    SCHEDULER_PARAMETERS: "-c1 -n1 -t5"
  script:
    - ./heat --help
    - ./heat dx=0.25 maxt=100 ic="rand(125489,100,50)" runame=test
  cache:
    key: test-cache-$CI_COMMIT_REF_SLUG
    paths:
      - test/
    policy: push
  artifacts:
    expire_in: 1h
    paths:
      - test/
When using Jacamar CI a cache will be stored in the data_dir defined
when your runner is deployed. This is the same base directory for your
builds (i.e., /home/<user>/.jacamar-ci/cache).
Note
Though we are exploring potential solutions, there is no automated cleanup of cache directories at this time.
For the final job we are going to be using gnuplot (for details covering
how the Container Build is supported please see the later portions
of this tutorial) to generate an .png from the results of our
heat-run job:
test-plot:
  stage: plot
  image: registry.gitlab.com/ecp-ci/ecp-ci.gitlab.io/startup-tutorial/plot:latest
  script:
    - make plot PTOOL=gnuplot RUNAME=test
  cache:
    key: test-cache-$CI_COMMIT_REF_SLUG
    paths:
      - test/
    policy: pull
  artifacts:
    name: "$CI_JOB_NAME-gnuplot"
    expire_in: 1h
    paths:
      - wall_plot.png
Once completed and committed to your repository you’ll be able to monitor the complete pipeline. Take the opportunity to dive into the job that generated and utilized the artifacts/cache options. In the case of artifacts they can be downloaded through the web gui.
Parallel Jobs
GitLab offers another helpful mechanism that allows a job to run multiple times in parallel in a single pipeline. This is defined simply the the parallel keyword:
heat-run-matrix:
  stage: run
  tags: [jacamar,slurm]
  variables:
    SCHEDULER_PARAMETERS: "-c1 -n1 -t5"
  script:
    - ./heat $CONDITION runame=test
  parallel:
    matrix:
      - CONDITION:
        - 'dx=0.25 maxt=100 ic="rand(125489,100,50)"'
        # - introduce your own conditions here.
Working with Large Repos
When working with large Git repositories, we can implement a few optimizations to improve the setup time of our CI/CD jobs.
1. Change the CI/CD Job Directory (CUSTOM_CI_BUILDS_DIR)
First, let’s examine the location of our builds. By default, Jacamar creates
the working directory for CI jobs in $HOME/.jacamar-ci. In HPC
environments, this standard location is a good starting point. However,
since home directory allocations are typically small and often experience
high utilization, moving to another filesystem might provide better
performance.
Note
In this tutorial, /home is the only shared filesystem between the
demo compute and login nodes. Our HPC center will likely have additional
shared filesystems.
To move the working directory for our jobs, we can either create a symlink from
another location to $HOME/.jacamar-ci or update the
CUSTOM_CI_BUILDS_DIR variable in our job script as follows:
variables:
  CUSTOM_CI_BUILDS_DIR: /path/to/project/$GITLAB_USER_LOGIN/$CI_CONCURRENT_ID/$CI_PROJECT_NAME
2. Clean Up Jobs After Execution Instead of Before (FF_ENABLE_JOB_CLEANUP)
By default, GitLab restores (or deletes and reclones, depending on the value of
GIT_STRATEGY) a repository at the start of a job. When dealing with large
repositories, this process can consume a significant portion of our allocated
time on a batch node.
We can instruct GitLab and Jacamar to clean up the repository after the job
finishes by setting FF_ENABLE_JOB_CLEANUP as a variable in the job’s
configuration like this:
variables:
  FF_ENABLE_JOB_CLEANUP: "true"
3. Reducing the Number of Commits Downloaded (GIT_DEPTH)
By default, GitLab downloads the last 50 commits from our repository. We can
further decrease the number of commits downloaded by lowering GIT_DEPTH
to 2 or 1.
Warning
Lowering $GIT_DEPTH to 1 can cause issues when using GitLab Merge Trains. Therefore, we generally recommend sticking to the default value of 50 when using merge trains.
To decrease the number of commits downloaded, we can update GIT_DEPTH
as follows:
variables:
  GIT_DEPTH: "2"
Note
There are instances where restricting your Git depth can have an adverse affect for projects leveraging submodules. Please keep this in mind and test thoroughly before enabling.
4. Only Downloading When Necessary (GIT_STRATEGY)
Unlike CI/CD platforms such as GitHub Actions, GitLab attempts to update existing repositories on a filesystem rather than deleting and recloning them for every job.
Note
For large repositories, it is almost always better to use “fetch” to reduce bandwidth and setup time. However, if we are limited by storage space, “clone” will delete and reclone the repository, reclaiming space.
We can change this behavior to more closely mimic platforms like GitHub by
changing the GIT_STRATEGY variable as shown below:
variables:
  GIT_STRATEGY: "clone"
Additional Jobs
If time permits or you have a specific interest we’ve outlined several additional jobs you can experiment with adding to your pipeline.
Releasing Your Application
It is possible to easily release any content you wish from your project
seamlessly in your CI pipeline. To start with add a new release
stage to your .gitlab-ci.yml file:
stage:
  ...
  - release
Now we will want to begin construction of the release-job, this will
rely on functionality provided by GitLab through the release keyword.
In addition we are going to take steps to restrict when this job
runs (using rules) along with who can possible trigger it:
release-job:
  stage: release
  variables:
    PACKAGE_REGISTRY_URL: ${CI_API_V4_URL}/projects/${CI_PROJECT_ID}/packages/generic/hello-numerical-world/${CI_COMMIT_TAG}
  rules:
    - if: $CI_COMMIT_TAG =~ /^v\d+.\d+.\d+/
  release:
    name: 'Release $CI_COMMIT_TAG'
    tag_name: $CI_COMMIT_TAG
    description: $CI_COMMIT_TAG
    assets:
      links:
        - name: heat
          url: ${PACKAGE_REGISTRY_URL}/heat
Next we need to target an image with the required
release-cli
tool installed. GitLab provides one
(registry.gitlab.com/gitlab-org/release-cli:latest) and we’ve used
this as a base image for our tutorial’s helper:
release-job:
  ...
  image: registry.gitlab.com/ecp-ci/tutorials/hello-numerical-world/helper:latest
  script:
    - echo "Uploading release ${CI_COMMIT_TAG} to ${PACKAGE_REGISTRY_URL}"
    - |
        curl --location \
          --header "JOB-TOKEN: ${CI_JOB_TOKEN}" \
          --upload-file heat \
          "${PACKAGE_REGISTRY_URL}/heat"
Note
One of the oddities that currently exists with Jacamar’s supported
run mechanism is the shell script that the runner generates. This
will always be a Bash script because the runner is operating on
the host system; however, you will run into cases where the target
image doesn’t have Bash installed by default. You can either install
this (as we did with the helper image) or manually set a valid
entrypoint configuration.
Now we need to make sure we upload the target file to the
GitLab package registry, luckily we can simply use the
CI_JOB_TOKEN to authenticate:
release-job:
  ...
  script:
    - echo "Uploading release ${CI_COMMIT_TAG} to ${PACKAGE_REGISTRY_URL}"
    - |
        curl --location \
          --header "JOB-TOKEN: ${CI_JOB_TOKEN}" \
          --upload-file heat \
          "${PACKAGE_REGISTRY_URL}/heat"
Finally, we need to make sure that the compiled heat application
is present. By default a job will download all artifacts from every
job/stage previously captured. However, by defining specific dependencies
we can limit the number of artifacts our job will download:
release-job:
  ...
  dependencies:
    - gcc-build
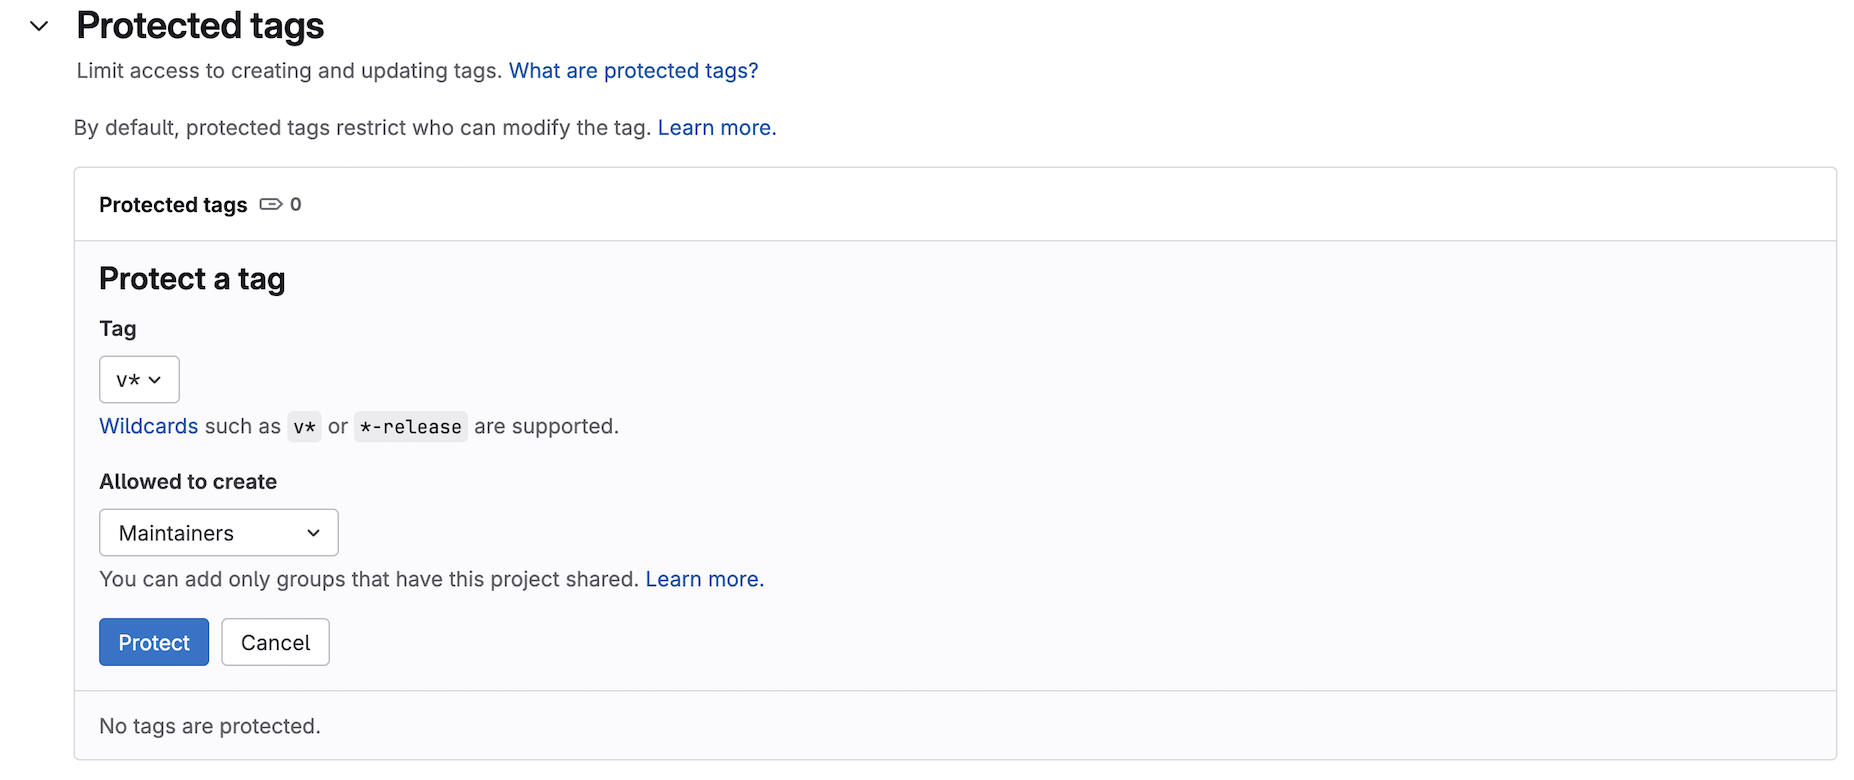
Now, after committing this code you’ll notice that the release-job will
not be present in your pipeline due to the rules we defined. However,
before creating any tags lets restrict who can push these tags to your
project using Protected Tags. This can found in your project’s
Settings -> Repository menu:
Now feel free to create a new tag for your project
that matches the v\d+.\d+.\d+ regular expression:
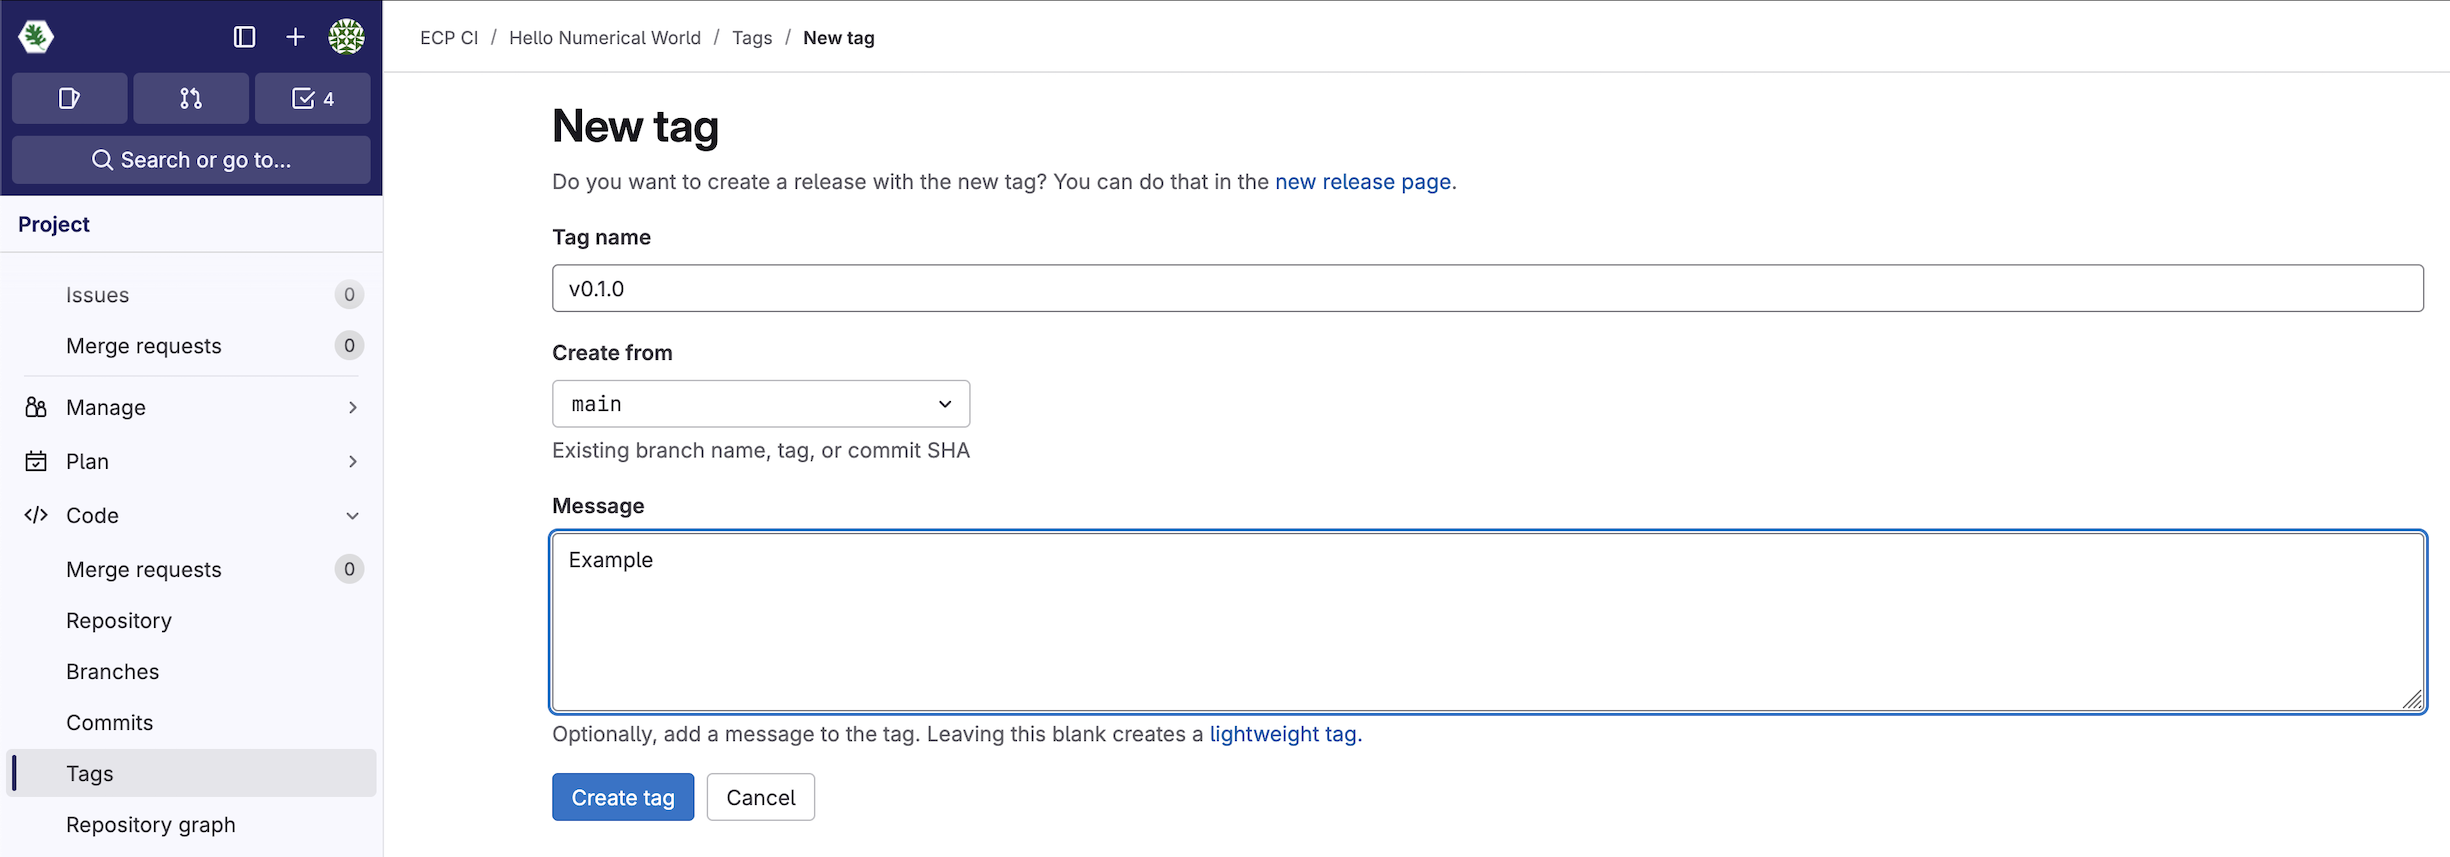
Once you’ve created this tag your pipeline, containing the release-job
will run and upon cmpleitation you’ll end up
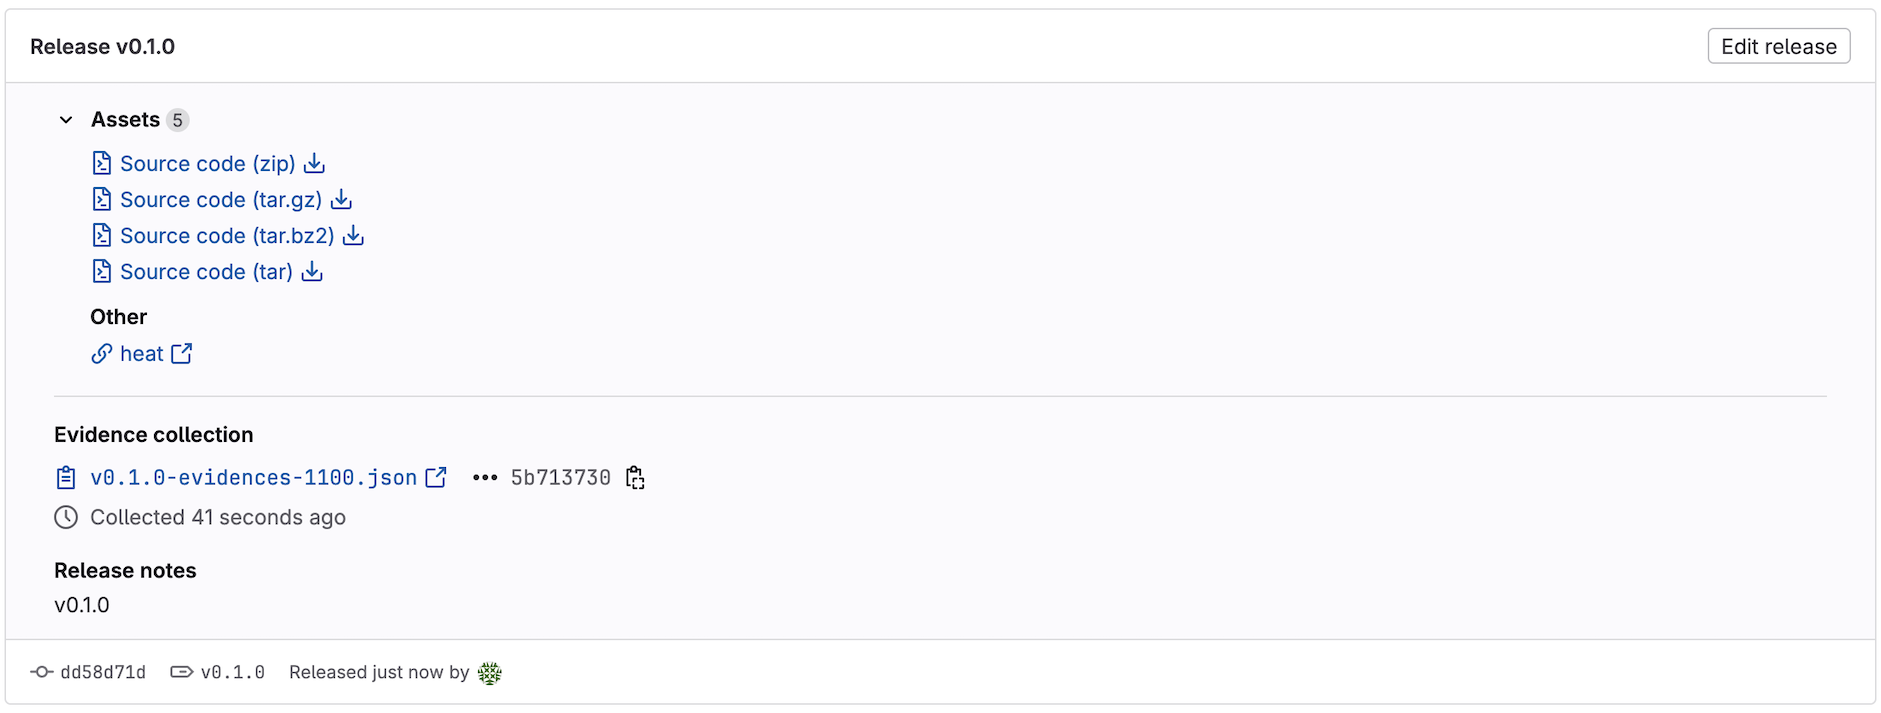
There is a lot more functionality that is documented by Gitlab. However, this workflow only functions if your releasing to the same repository from where the pipeline is triggered. That isn’t always possible, so we recommend looking into writing your own release script. We have found great success in using the python-gitlab library:
import gitlab

gl = gitlab.Gitlab(url, private_token=token)
project = gl.projects.get(project_id)

project.generic_packages.upload(...)

newRelease = project.releases.create({
    "name": "v" + ver,
    "tag_name": "v" + ver,
    "description": '''
      Release description here...
    '''
})
Container Build
Note
Since our tutorial instance does not have the GitLab registry enabled
you will need to target another GitLab instance if you attempt to add
this job. Please account for this by updating the CI_REGISTRY_*
variables and setting any required secret through the
project variables.
If we wanted to continue leveraging Spack to build our
Container Images
that is completely feasible. The spack containerize feature is incredibly
exciting and make converting a Spack environment to a portable image simple.
We’ve already defined a valid spack.yaml file that will leverage the
a build_cache we’ve already created.
Begin by editing your .gitlab-ci.yml file:
gnuplot-container:
  stage: build
  variable:
    IMAGE_TAG: ${CI_COMMIT_SHORT_SHA}
  script:
    - spack env activate -d gnuplot_env
    - spack containerize > Dockerfile
    - |
      buildah build -t "${CI_REGISTRY_IMAGE}/gnuplot:${IMAGE_TAG}" \
        --authfile=${CI_PROJECT_DIR}/auth.json -f Dockerfile .
You’ll likely notice that we are targeting a authfile that
doesn’t exist yet. One option for supplying this (primarily when
dealing with external registries) to leverage the
file type variable.
However, if you are using your GitLab project’s registry you can
add a simple login command to your before_script:
gnuplot-container:
  ...
  before_script:
      - |
        builtin echo "${CI_REGISTRY_PASSWORD}" | podman login \
          --authfile=${CI_PROJECT_DIR}/auth.json \
          -u="${CI_REGISTRY_USER}" \
          --password-stdin \
          "${CI_REGISTRY}"
Going this route avoids potential conflicts if multiple jobs ever attempt
to save credentials to your user level authfile, since the CI_REGISTRY_PASSWORD
is scoped to a single job.
Lets also add some rules to help control when our image will
be built and tag as the latest release.
rules:
  - if: $CI_PIPELINE_SOURCE == "merge_request_event"
  - if: $CI_COMMIT_BRANCH == $CI_DEFAULT_BRANCH
    changes:
      - gnuplot_env/**/*
    variables:
      IMAGE_TAG: latest
  - when: manual
    allow_failed: true
Before committing the change be sure to make an arbitrary changes to
an file/folder found in gnuplot_env/, as this will ensure
the resulting pipeline runs our newly added gnuplot-container
and releases it with the latest tag.